Email to lead in salesforce
Nov 09, 2023

After completing this unit, you will able to:
- Introduction
- What is Email-To-Lead
- Add Picklist Value of Lead and Case
- Setup Email service
- Create Flow
- Test Your Email Service
1. Introduction
Email-to-Lead is a feature in Salesforce that allows businesses to capture leads and potential customers directly from incoming emails. This feature streamlines the lead generation process by automatically converting relevant email inquiries into leads within the Salesforce platform.
2. What is Email-To-Lead
In Salesforce, Email-to-Lead is a feature that allows businesses to automatically create lead records in their Salesforce organisation from incoming emails. This feature is particularly useful for capturing and managing potential sales leads generated through email communication. When an email is received at a specified email address, Salesforce can automatically parse the email content and create a lead record with relevant information, such as the sender's contact details and any other data included in the email.
Email-to-Lead simplifies the lead generation process by eliminating the need for manual data entry. It helps businesses respond quickly to inquiries and potential leads,ensuring that important opportunities are not missed. Once the lead records are created, they can be assigned to sales representatives for follow-up, nurturing, and potential conversion into customers.
3. Add Picklist Value on Case and Lead:
For Case Object:
- Click on setup.
- From Object Manager, Select the type Case.
- Select the Fields & Relations, then click New.
- Click on the Case Origin field.
- Navigate to the Case Origin Picklist and click the New button.
- Add a new value Lead, if you have any record type make sure to select the relevant record type.
- Click on Save button.

For Lead Object:
- Click on setup.
- From Object Manager, select Lead object.
- Click the Fields & Relationships.
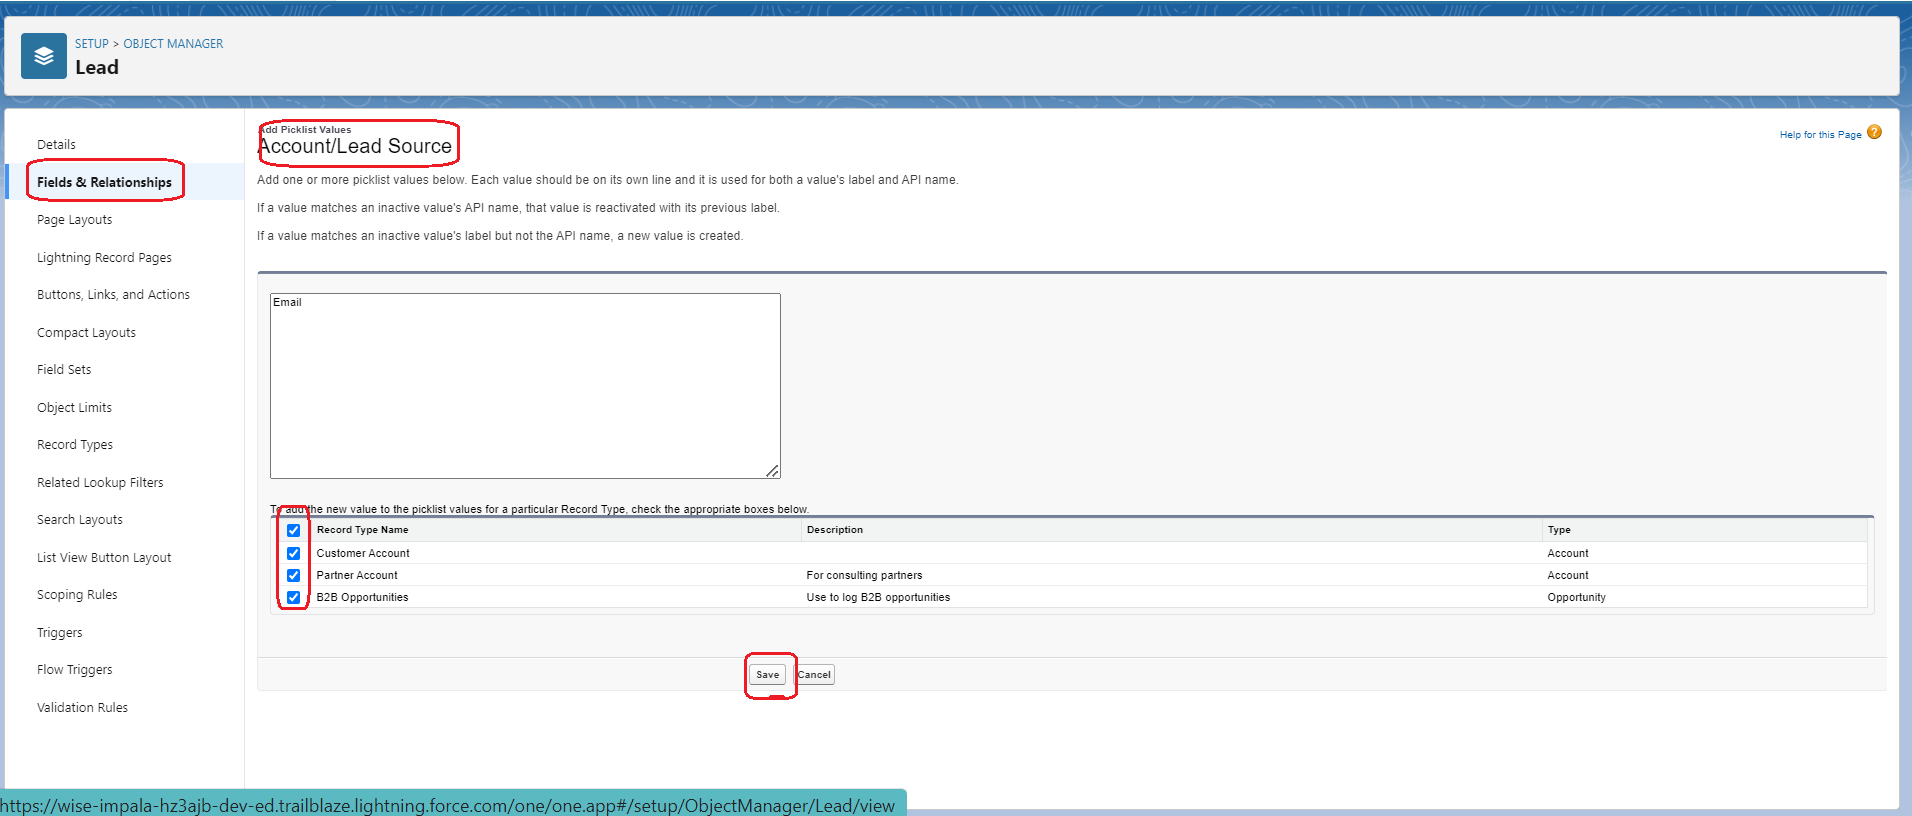
- Click on the Lead Source field.
- Navigate to the Account/Lead Source Picklist Values and click the New button.
- Add a new value Email, if you have any record type make sure to select the relevant record types.
- Click on Save button.
4. Setup Email service:
Click here : https://phenoble.com/blogs/how-to-email-to-case-in-salesforce.html
5. Create Flow:
Now we will create Record-Trigger flow.
- Define Flow Properties:
- Click on setup Button.
- In the Quick Find Box, search Flows.
- Click Flows, and Click New Flow.
- Select Record-Triggered Flow ,Click on Create Button.
- Make sure you select Free-Form from Top of the Flow
- Set up Record Trigger Details:
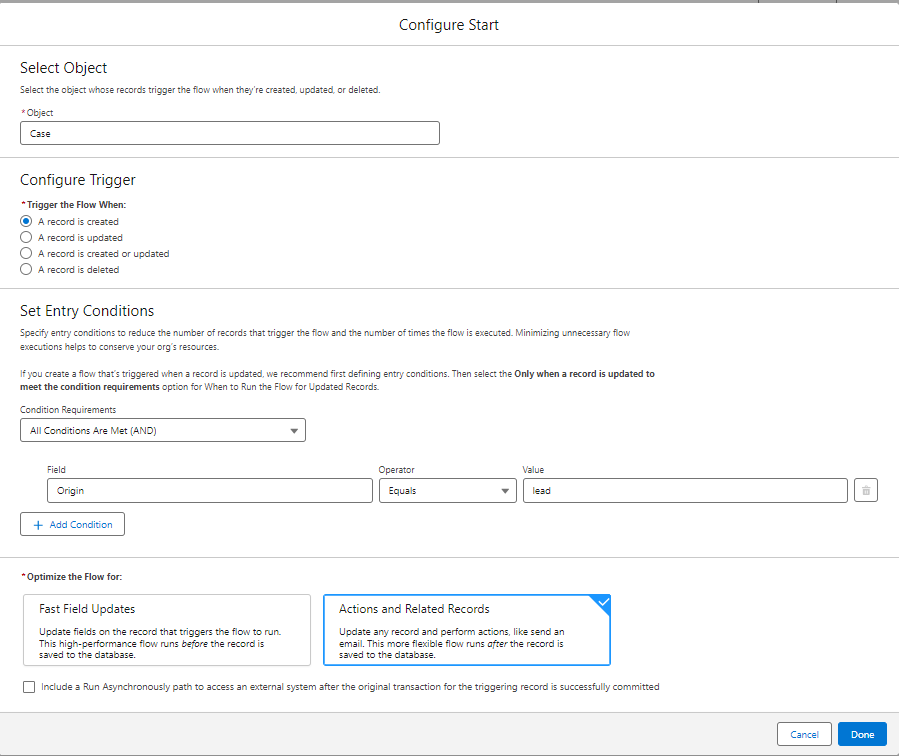
Now we need to set up the details of trigger record (Case Record) and make sure you have selected the information like the below steps:
- Object: Case
- Trigger the Flow When: A Record is Created
- Set Entry Conditions:
Condition Requirements: All Condition Are Met (AND)
Field: Origin
Operator: Equals
Value: Lead
4. Optimise the Flow for : Actions and Related Records
5. Click on Done.
6. In the ToolBox, Drag the Get Records Element and join Record Trigger Flow.
- Get the Trigger Record:
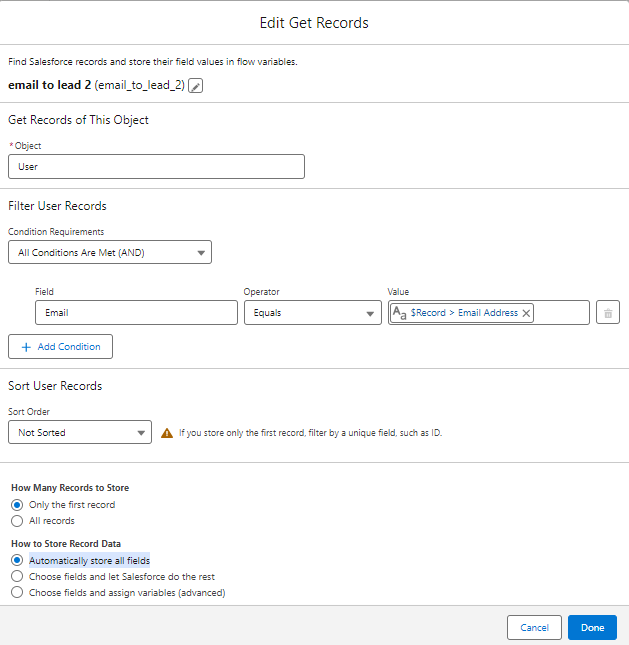
Now we need to set up the details of Get record and make sure you have selected the information like the below steps:
- Get Records of This Object:
Object :Users
2. Filter User Records :
Condition Requirements: All Condition Are Met (AND)
Field: Email
Operator: Equals
Value: {!$Record.SuppliedEmail}
3. How Many Records to Store: Only the first record
How to Store Record Data: Automatically store all fields
- Click on Done.
- In the ToolBox Drag the Create Records Element and join the Get Record Element.
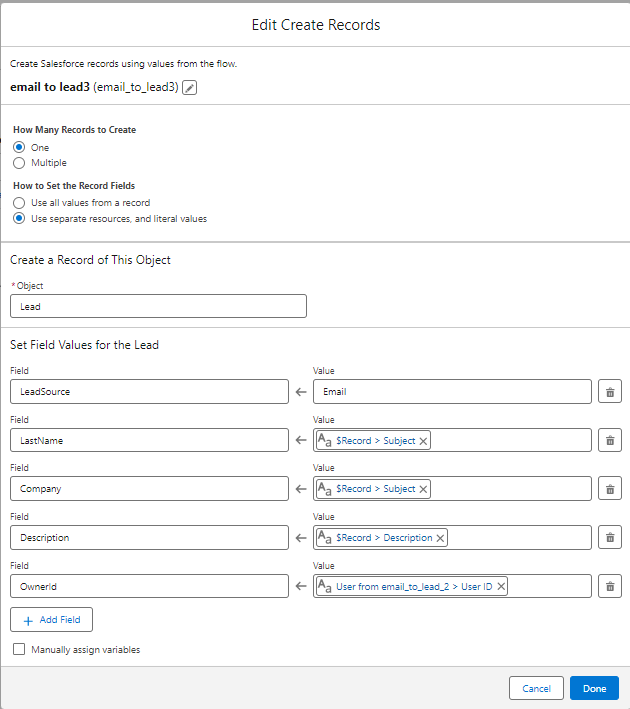
- Create Lead Record:
Now we need to set up the details of Create record and make sure you have selected the information like the below steps:
1. How Many Records to Create: One
How to Set the Record Fields: Use separate resources, and literal values
2. Create a Record of This Object:
Object: Lead
3. Set Field Values for the Lead:
| Row: 1 | Field: Lead Source | Value: Email | Click: +Add Field |
| Row: 2 | Field: LastName | Value: {!$Record.Subject} | Click: +Add Field |
| Row: 3 | Field: Company | Value: {!$Record.Subject} | Click: +Add Field |
| Row: 4 | Field: Description | Value: {!$Record.Description} | Click: +Add Field |
| Row: 5 | Field: OwnerId | Value: {!email_to_lead_2.Id} |
4. Click on Done.
5. In the ToolBox Drag the Delete Records Element and join the Create Record Element.
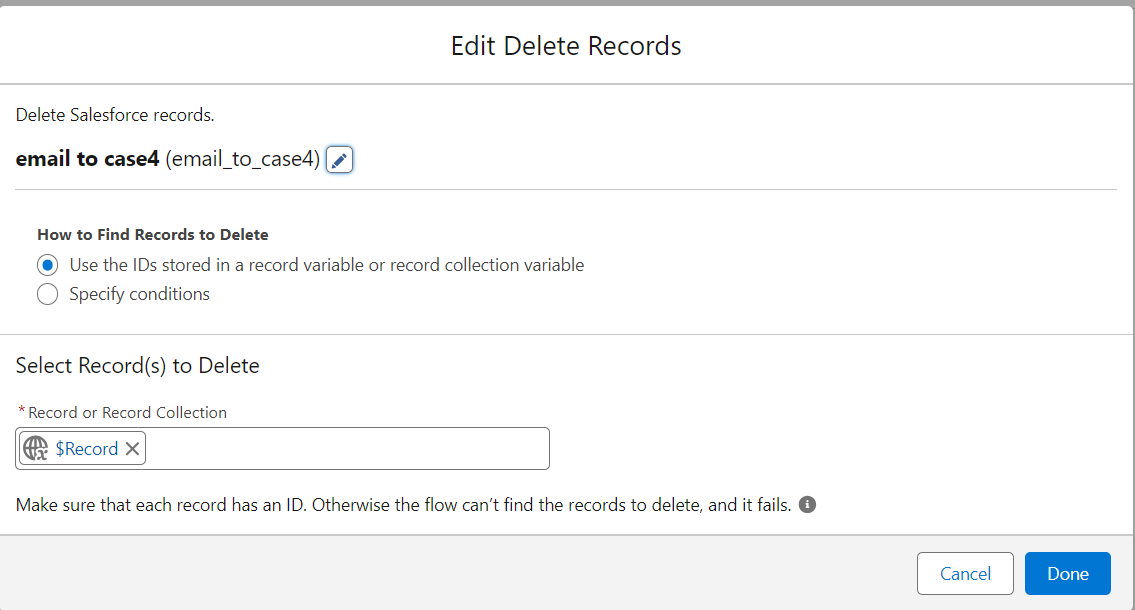
- Delete Triggered Record:
- How to Find Records to Delete: Use the IDs stored in a record variable or record collection variable
- Select Record(s) to Delete:
Record or Record Collection: {!$Record}
- Click on Done.
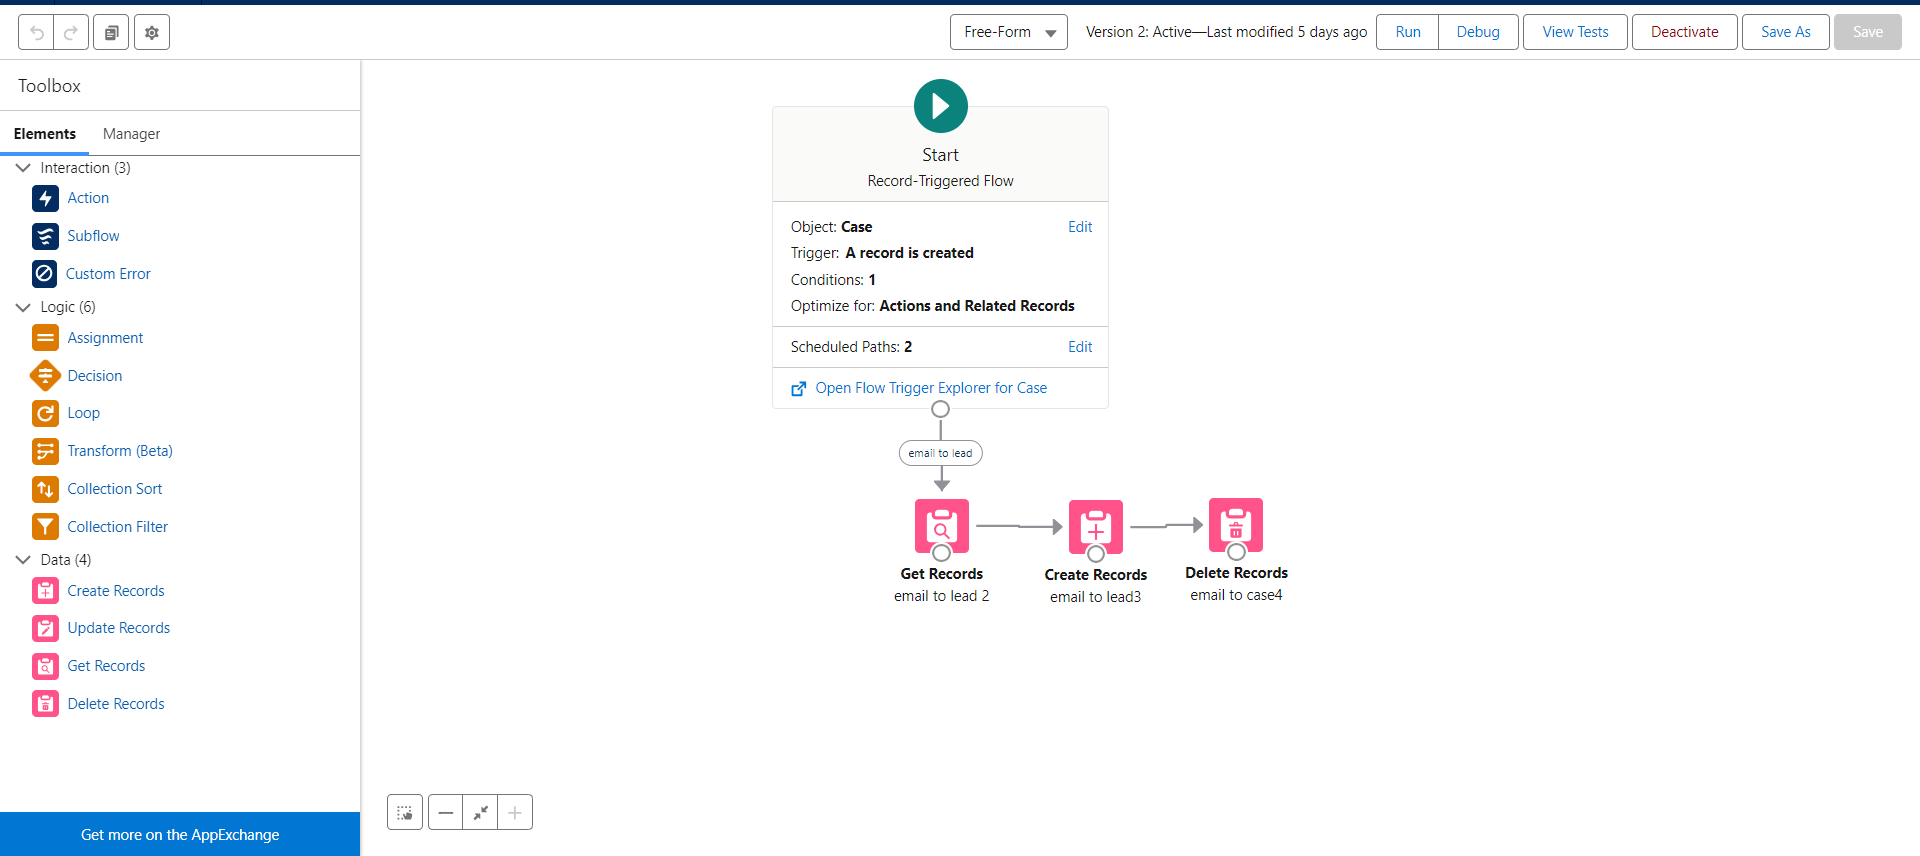
Flow should look like this figure:
6. Test Your Email Service:
Send an email to the specified Email Service Address (generated in the step 4) to test the email service like the below figure:

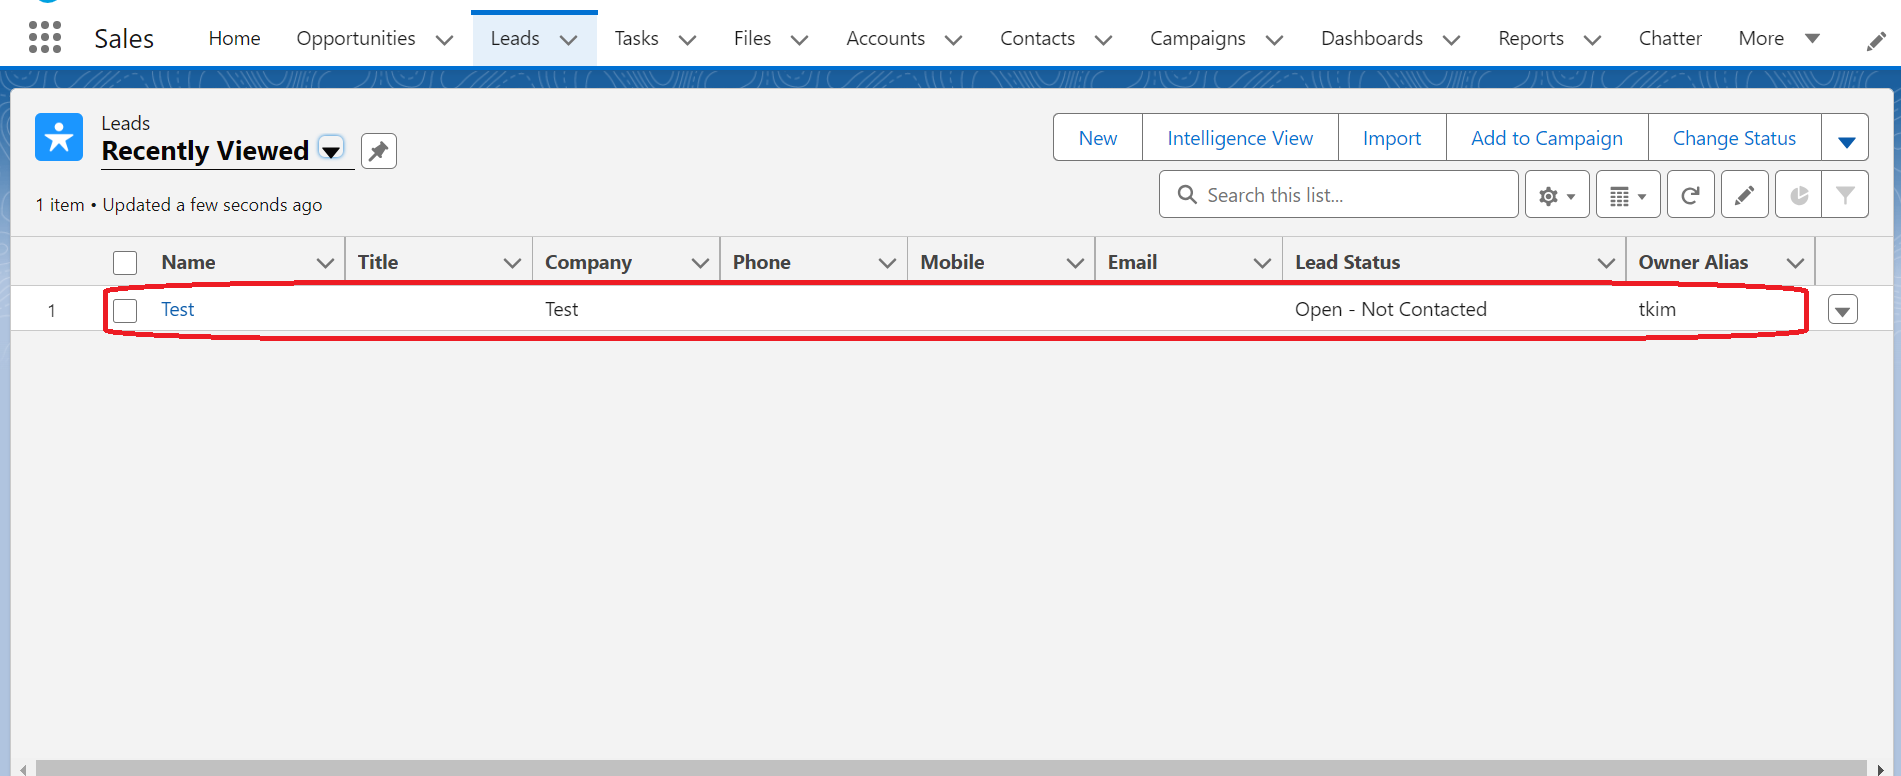
Lead record should be created in the Salesforce like the below figure: