The SDR agent is an important AI tool for sales teams, officially known as the Agentforce SDR (Sales Development Representative) agent. It is an autonomous, proactive agent that performs key tasks automatically to help with lead management.
What is an SDR Agent?
The SDR Agent, formally known as the Agentforce Sales Development Representative (SDR) agent, is a key component of Agentforce for Sales. It is an autonomous, proactive agent driven by AI that is designed to help sales teams. The primary function of the SDR agent is to nurture leads at scale 24/7. This is considered transformative for sales teams, allowing them to focus on building customer relationships and pipeline growth.
Functional Role of the SDR Agent
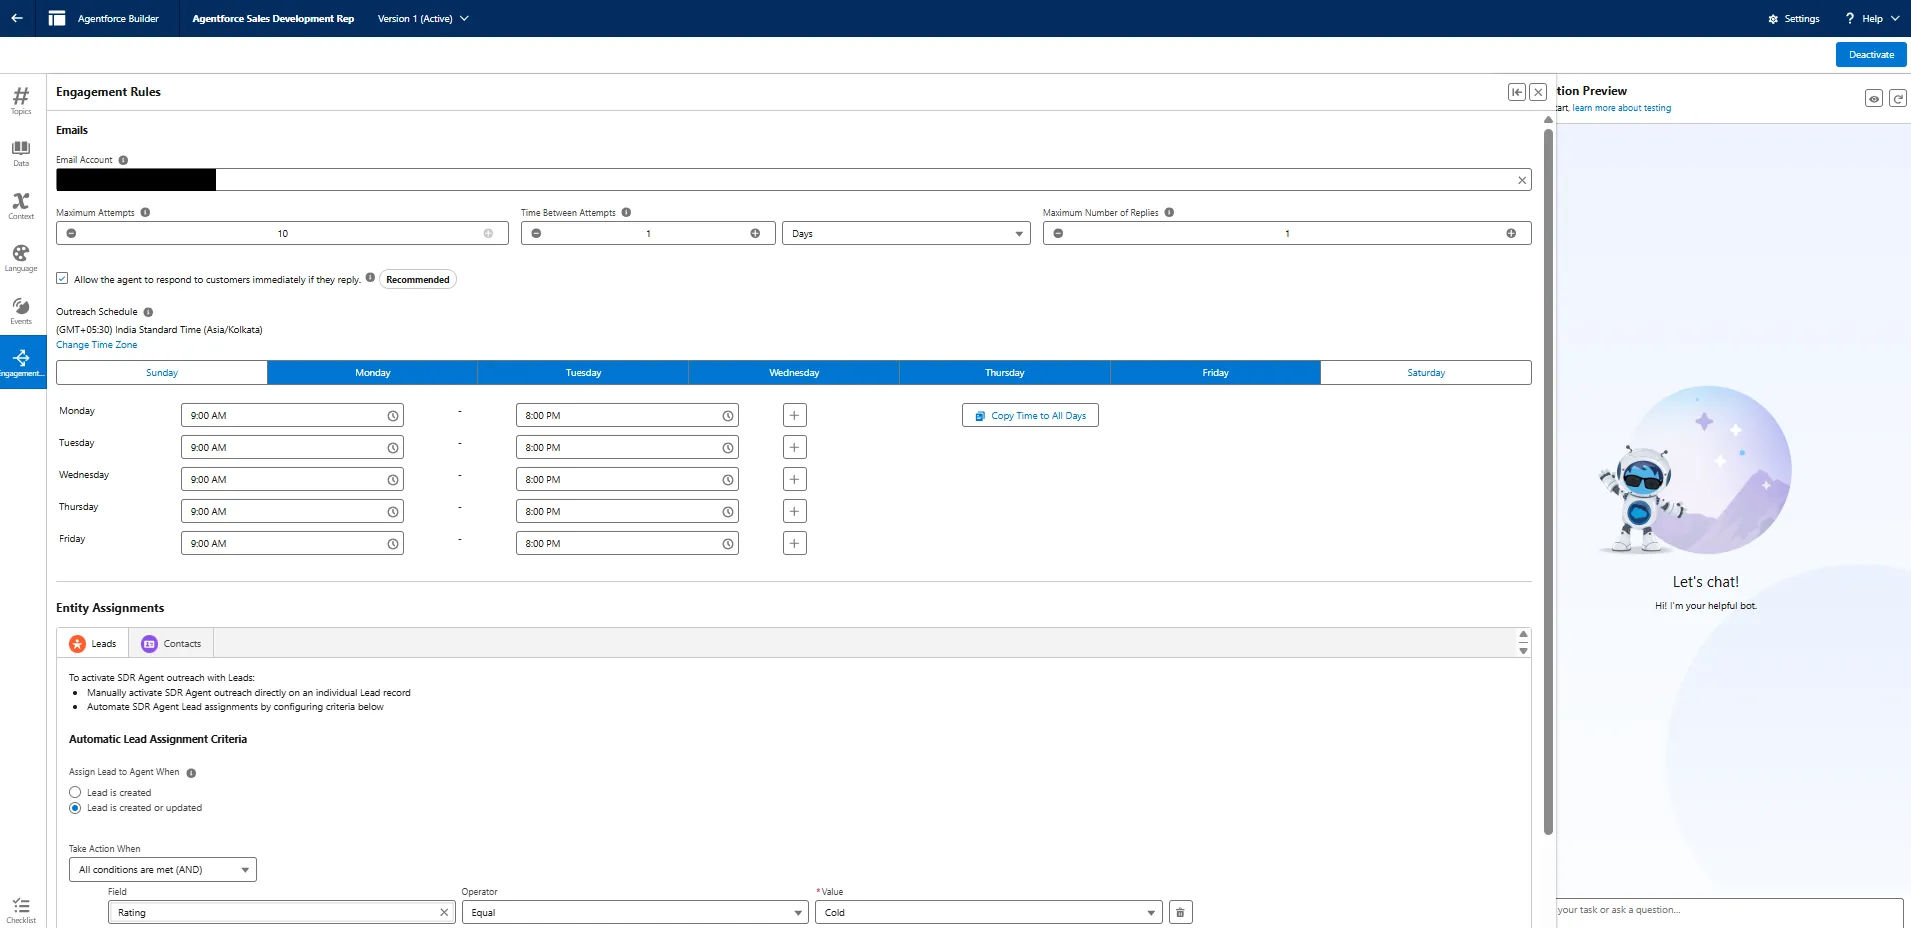
- Outreach and Engagement: SDR agents send personalized outreach, answer customers’ questions accurately, and can even book meetings on behalf of the sales team.
- Knowledge Base: The agent uses organizational information (such as product descriptions, price sheets, or white papers) uploaded via the Upload Files section to accurately answer customer questions.
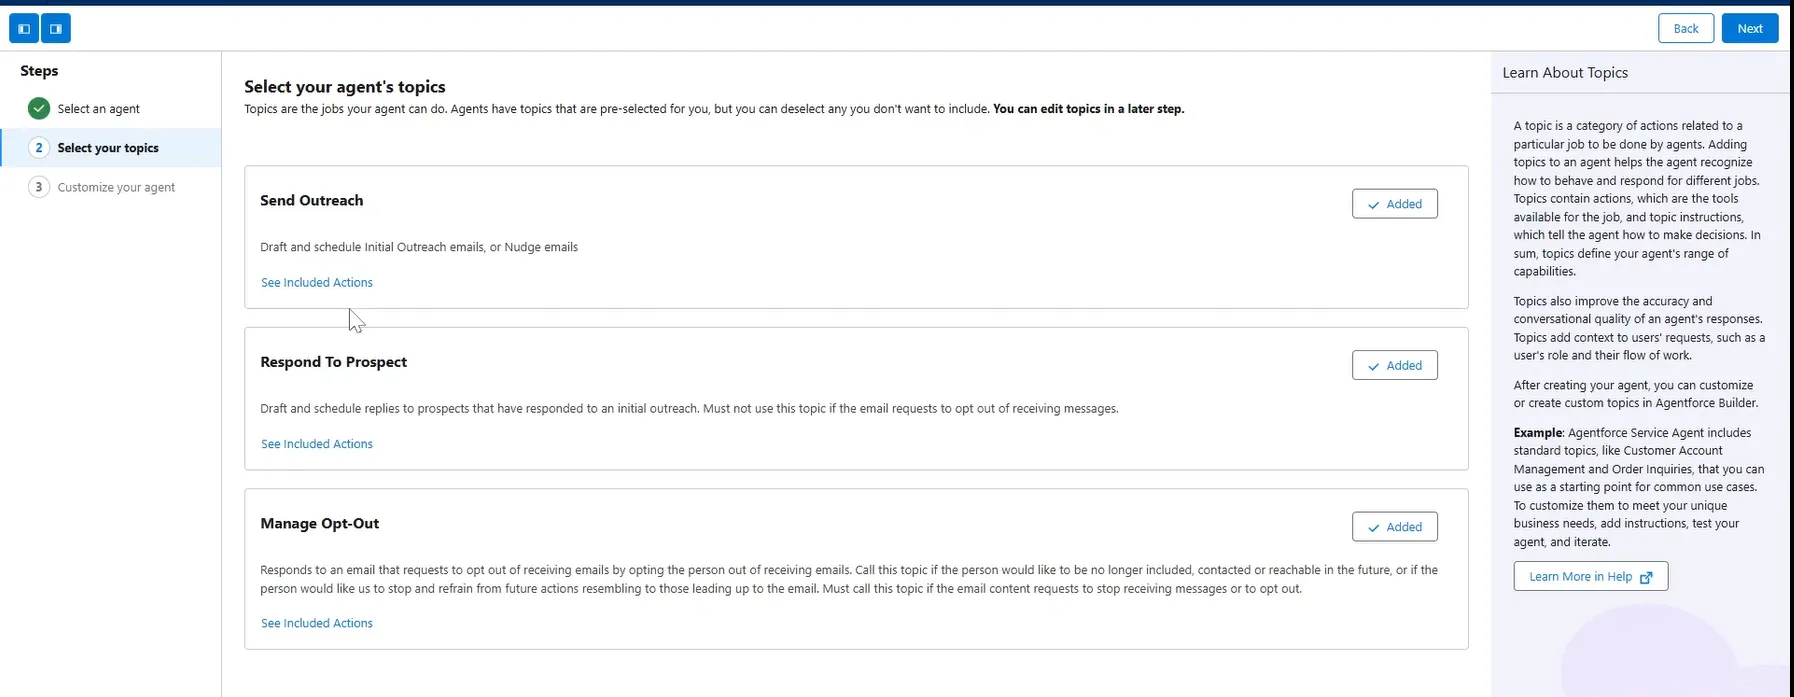
- Communication Templates: The agent utilizes out-of-the-box prompt templates for various interactions:
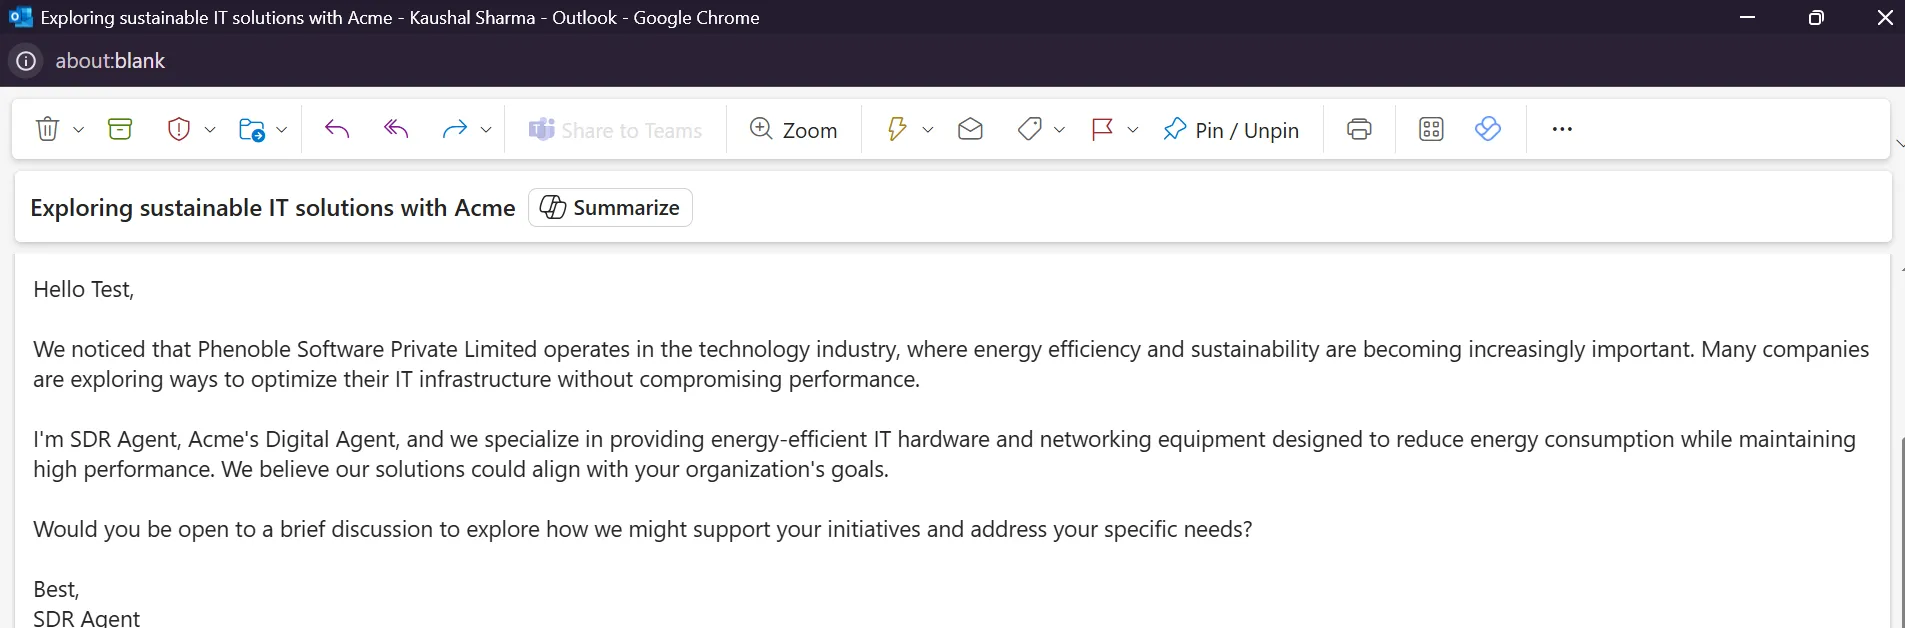
- Draft Agentforce SDR Intro Email: For initial outreach or first introduction emails to prospects.
- Follow-up on Agentforce SDR Email: A "nudge email" sent if a prospect does not engage or reply.
- Reply with Product Q&A Agentforce Email: Answers product questions using uploaded data and includes a meeting booking link.
- Reply with Meeting Agentforce SDR Email: A reply email for meeting booking that includes a meeting link or lead owner contact information.
- Reply with Fallback Response Agentforce SDR Email: A handoff email to the seller (lead owner) if the prospect reply is "not right now" or is an off-topic inquiry.
- Activity Visibility: The agent uses Einstein Activity Capture (EAC) when generating outreach and reply emails, which ensures its emails are captured in Salesforce, giving direct visibility into all of its activities.
Which user license is required?
The user license required for the Agentforce SDR agent is the Einstein Agent User license. This license must be assigned to the user record created. The user license required for the Agentforce SDR agent is the Einstein Agent User license. This license must be assigned to the user record created specifically for the SDR agent. The user license determines which profiles are available for the user. In addition to the Einstein Agent User license, the user record for the SDR agent must also be assigned the Einstein Agent User profile, which specifies the user’s minimum permissions and access settings. Furthermore, the agent needs the Agentforce SDR agent permission set assigned to its user record to perform its work
How can we configure the SDR Agent and Test it
-
Phase 1: Enable Supporting Features and Grant Access This phase lays the groundwork by turning on Agentforce and granting initial user permissions.
-
Enable Agentforce and SDR Agent:
- Click the gear icon and click Salesforce Go (or use Quick Find to select Salesforce Go if already in Setup).
- Scroll to the Get Started with Agentforce section and click Set Up on the Agentforce for Sales card.
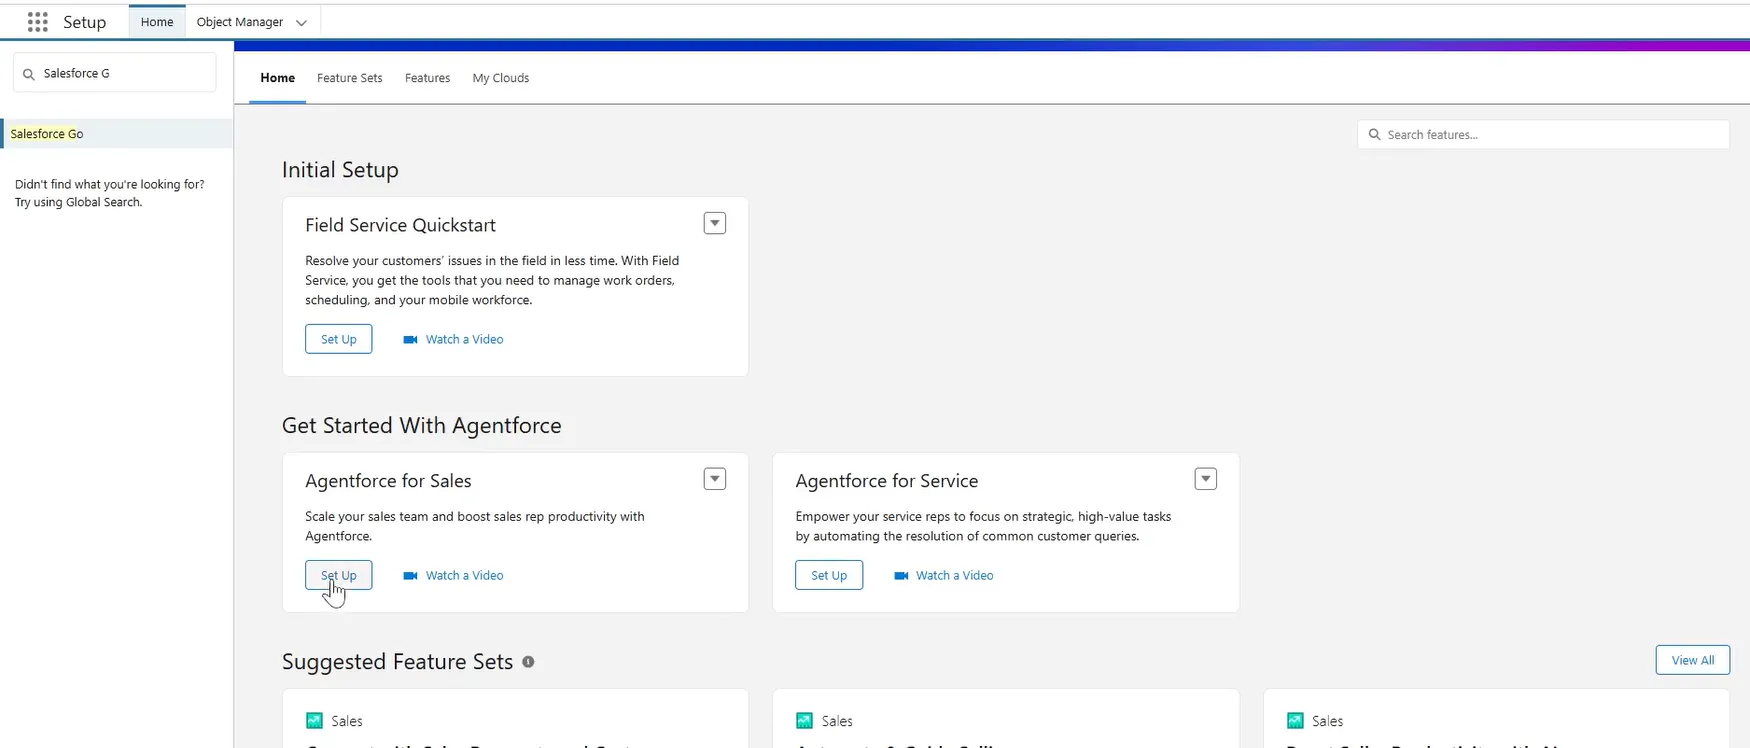
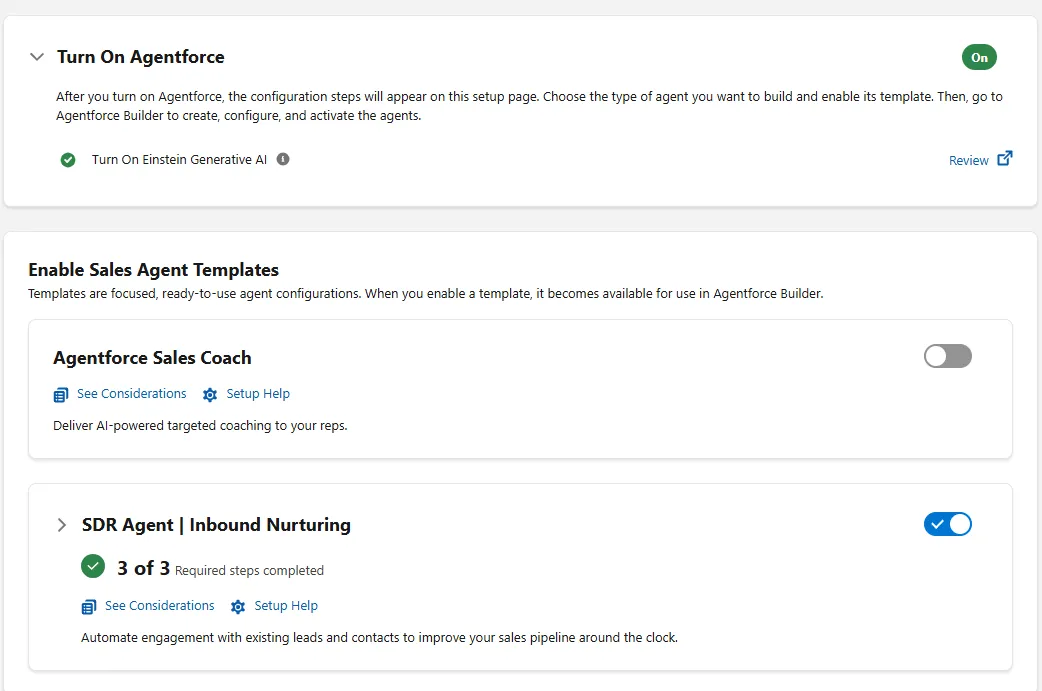
- Click Turn On Agentforce to enable Agentforce in your org, then click Confirm. This step automatically makes sales-related agents, including the Sales Coach and SDR Agent, available for setup.
- Toggle on SDR Agent | Inbound Nurturing.
- Click Confirm in the dialog box to activate the agent.
-
Grant User Access for Configuration and Use:
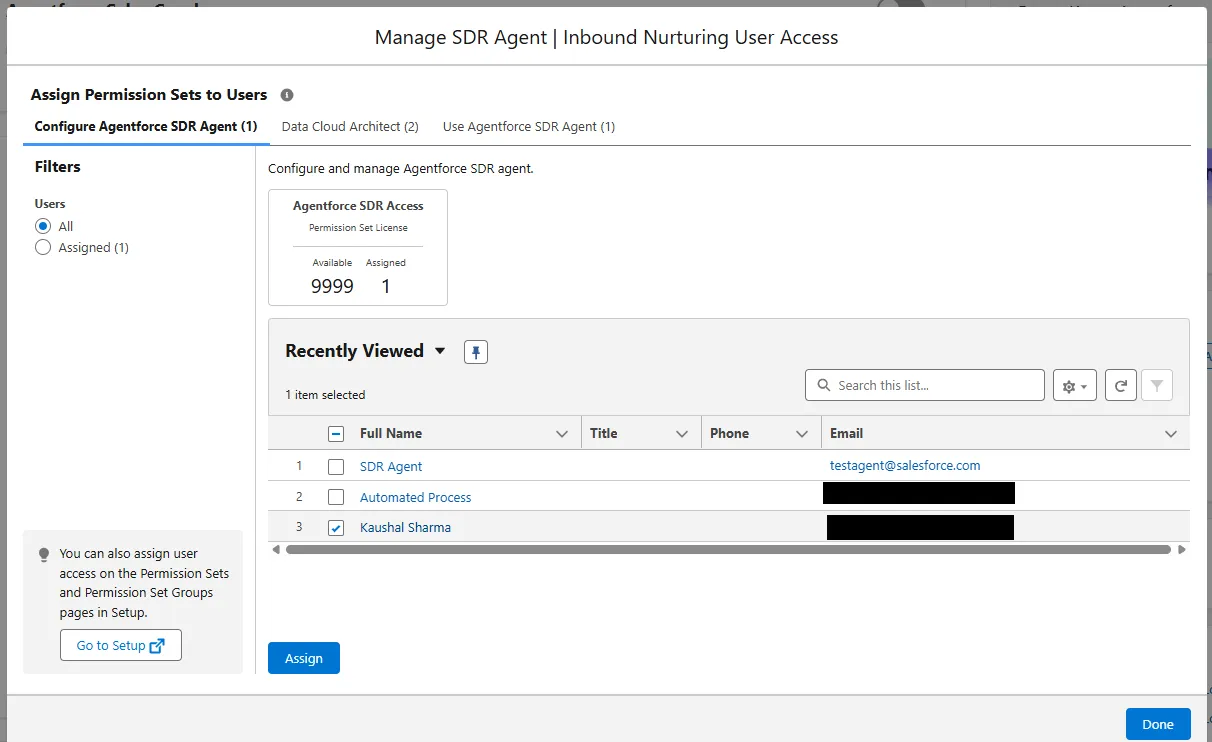
- In the SDR Agent | Inbound Nurturing setup area within Salesforce Go, click Manage next to Manage User Access.
- In the Configure Agentforce SDR Agent tab, select All Users from the Recently Viewed dropdown.
- Check the box next to YOUR NAME and click Assign to grant yourself the ability to configure the agent.
- Click the Use Agentforce SDR Agent tab.
- Select All Users, check the box next to YOUR NAME, and click Assign to grant yourself the ability to use the agent.
- Click Done.
-
-
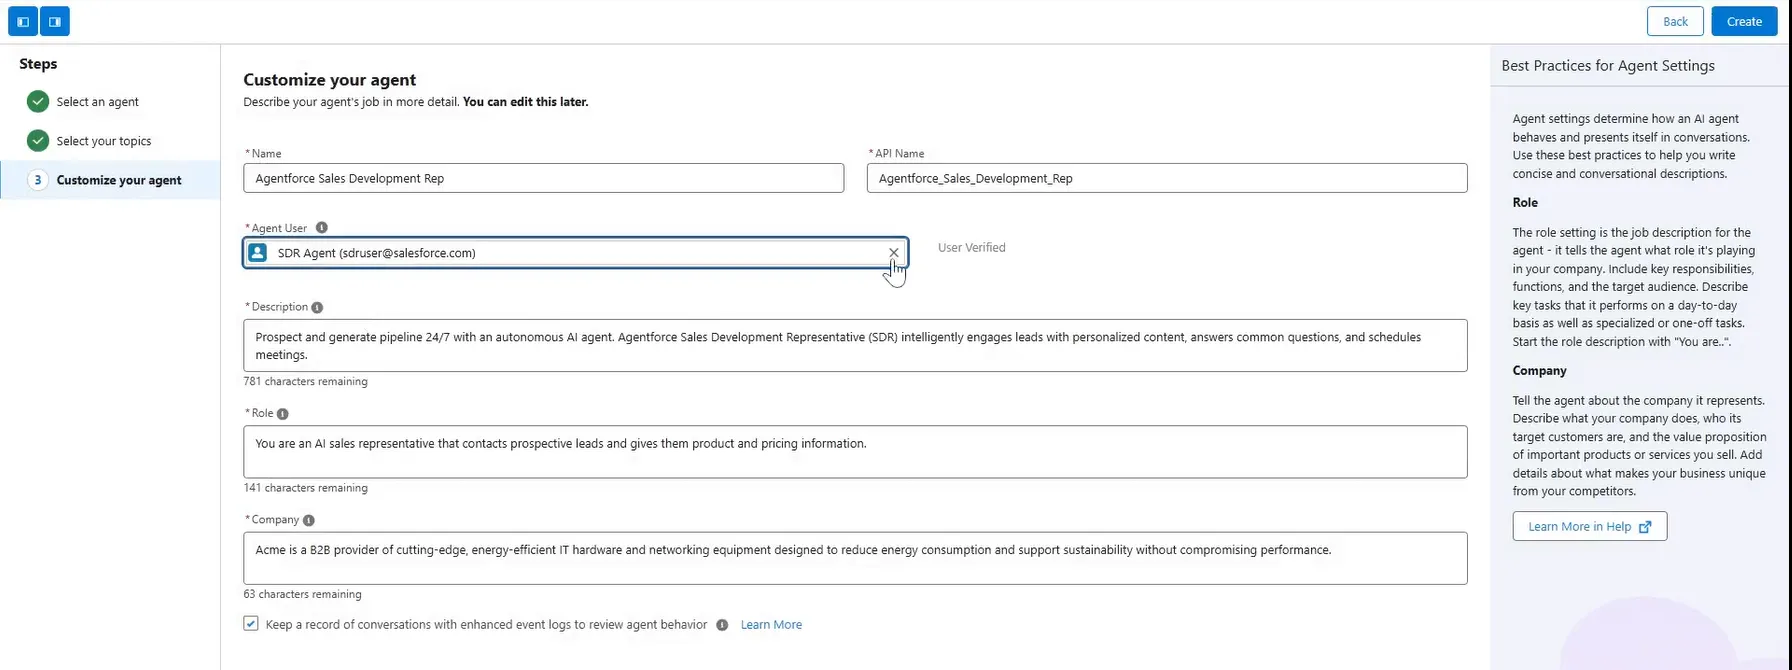
Phase 2: Create an SDR Agent User Record Because the agent acts like a user in your organization, a specific user record must be created for it, along with necessary permissions and email configuration.
-
Create the User Record:
- From Setup, use the Quick Find box to search for and click Users.
- Click New User to create a new user record specifically for the SDR agent.
- Populate the new user fields according to your company’s preferences.
- Crucially, assign the required license and profile:
- User License: Einstein Agent.
- Profile: Einstein Agent User.
- Click Save.

-
Assign Permissions to the SDR Agent User:
- In the Quick Find box, type and click Permission Sets.
- Find and click Agentforce SDR agent from the list.
- Click Manage Assignments.
- Click Add Assignments.
- Check the box next to SDR Agent (do not assign this to yourself), click Next, click Assign, and click Done.
-
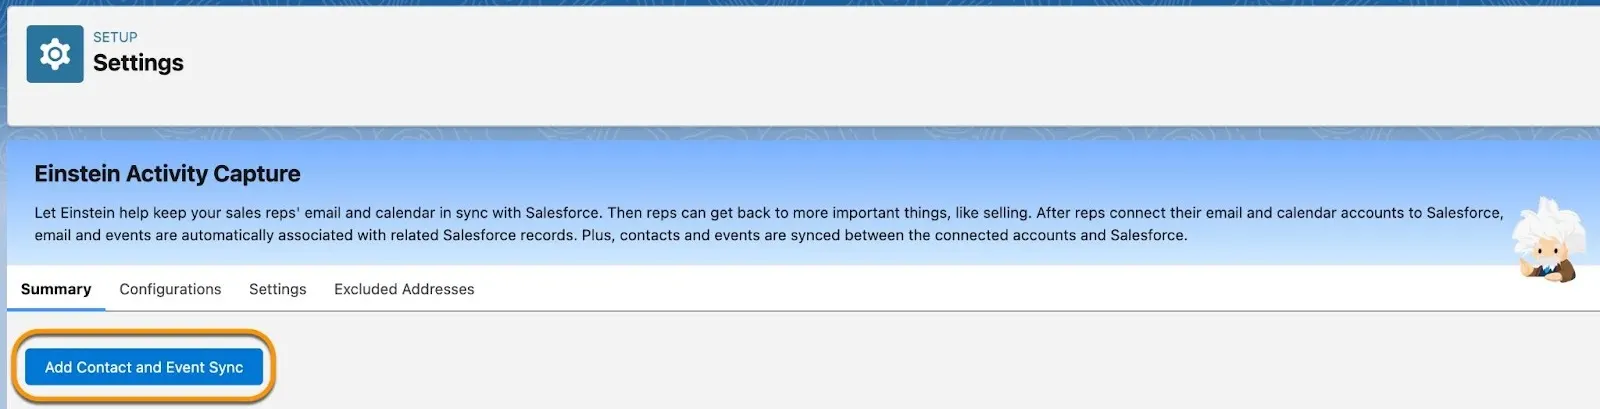
Add the SDR Agent to Einstein Activity Capture (EAC):
- In the Quick Find box, type Einstein Activity Capture.
- Click Settings under the Einstein Activity Capture heading.
- Click Add Contact and Event Sync.
- Select your Email and Calendar services, then click Next.
- Select the user connection preference, then click Next.
- Enter a name and optional description for the new EAC configuration, then click Next.
- Verify the Sync Settings (email sync is required for Agentforce SDR) and click Next.
- Verify Advanced Settings.
- On the EAC Add Users and Profile screen, move the SDR Agent user you created from the Available to Selected list, and click Next.
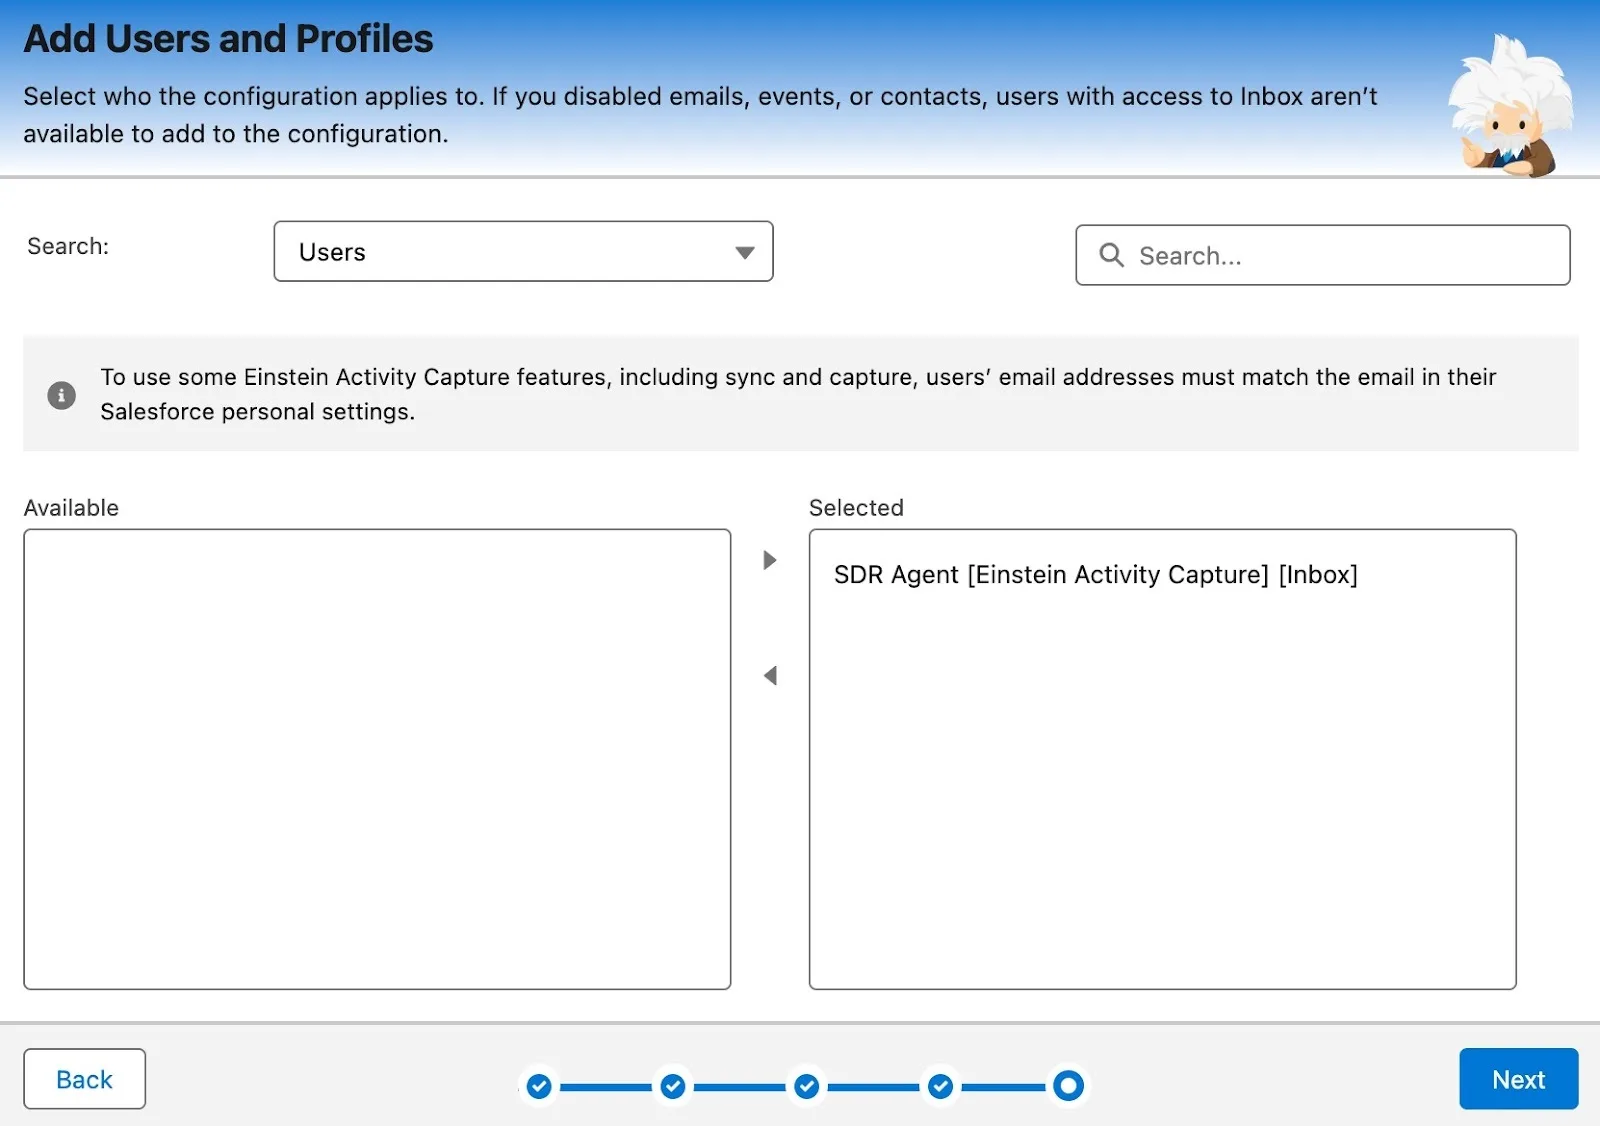
- Click Finish.
-
Connect Sales User Email Accounts (for Sellers):
- To allow sellers to view, edit, reschedule, or cancel SDR agent emails from the Activity Timeline of leads, each seller must connect their email account in their Salesforce user profile.
- From the seller’s Personal Settings, they navigate to Email and Calendar Accounts under the Connected Accounts, click New Account, and follow the steps to connect their account.
-
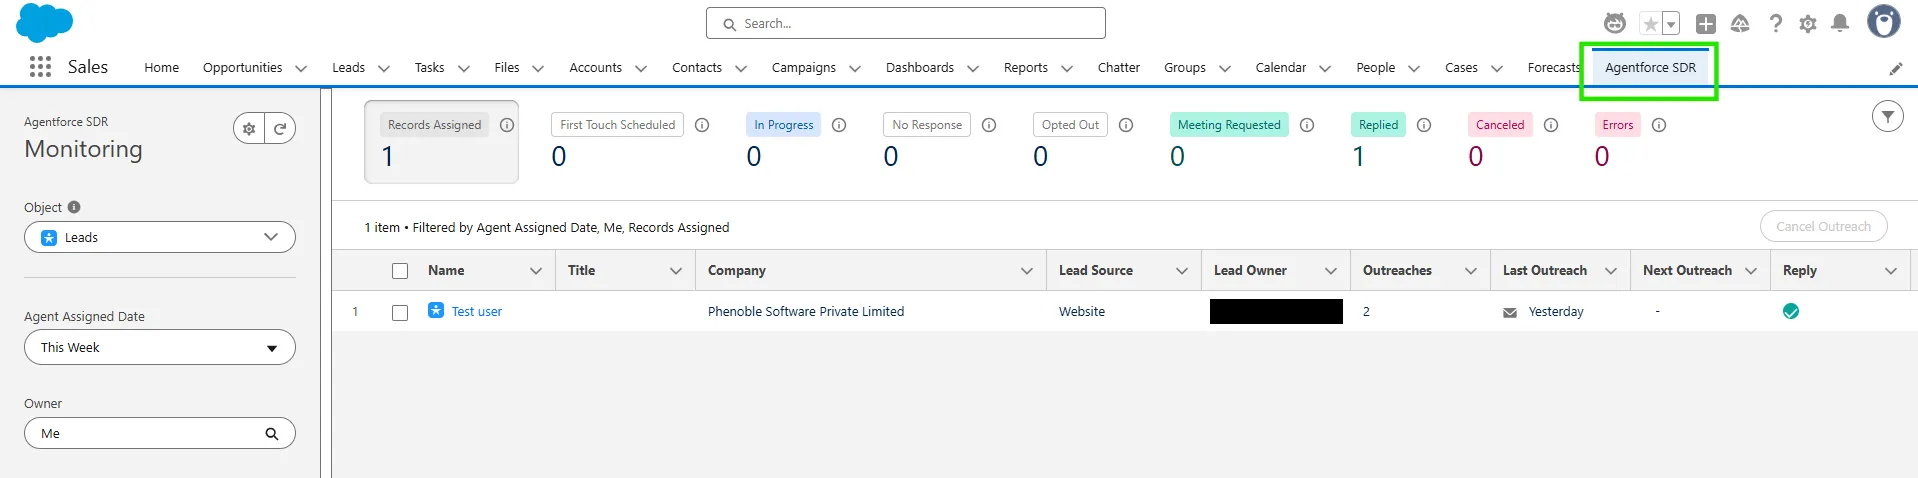
 Try to reply this above mail "It is possible to get a trial of Sales Cloud?"
Then you will get:
Try to reply this above mail "It is possible to get a trial of Sales Cloud?"
Then you will get:
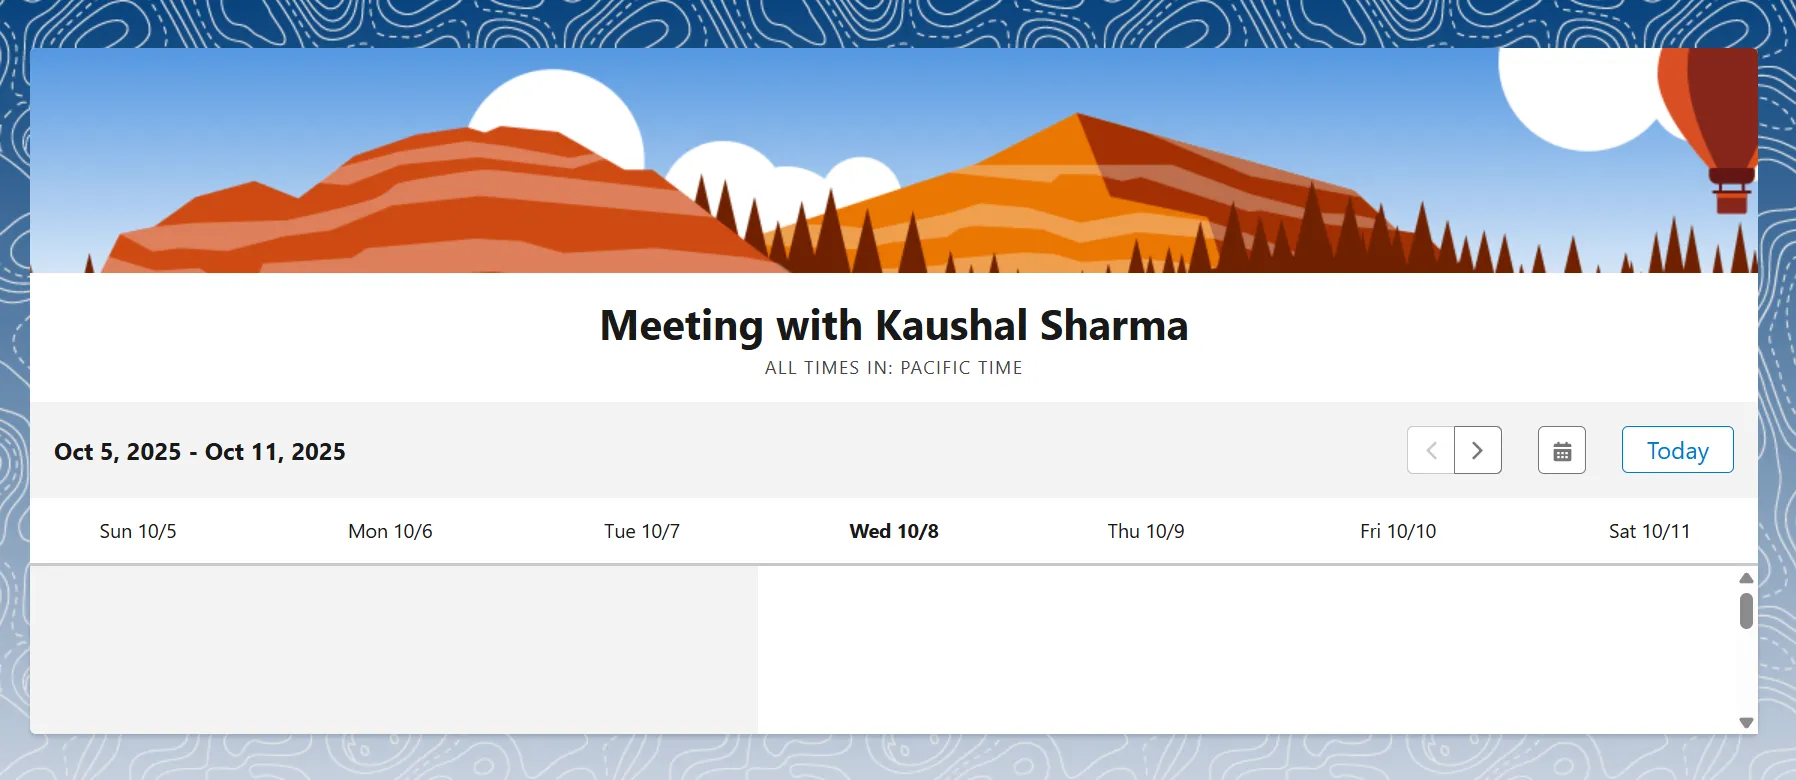
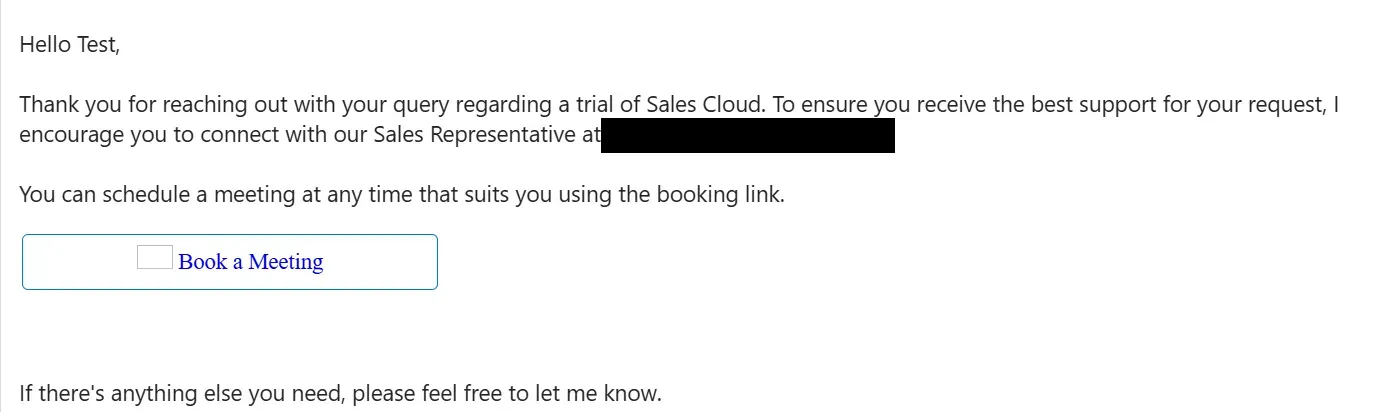 Click on Book a Meeting button.
You will redirect on this page:
Click on Book a Meeting button.
You will redirect on this page: