
What we will cover in this Guide:
- Step 1: Adding Escalation Action in Agentforce AI Agent
- Step 2: Create a new Routing Configuration
- Step 3: Create a new Queue
- Step 4: Create a new Presence Statuses
- Step 5: Create a new Permission Set and Assign Presence Statuses
- Step 6: Enable user for Service Cloud
- Step 9: Create Flow and Add it to existing Agent
- Step 10: Create a new Messaging Channel
- Step 8: Add Omni-Channel to Service Console App
- Step 10: Test the Agent with existing community site
What is Agentforce?
Agentforce is Salesforce's AI-powered conversational agent, built to handle customer queries via digital channels like chat, messaging, and more. It integrates deeply with Omni-Channel, Service Cloud, and the new Prompt Builder for intelligent conversations.
A common requirement is to route the chat to a live agent when the AI can't resolve the issue.
Step 1: Adding Escalation Action in Agentforce AI Agent
- In the Quick Find box Search for Agentforce Agents
- Open the Agent and click on Open in Builder button
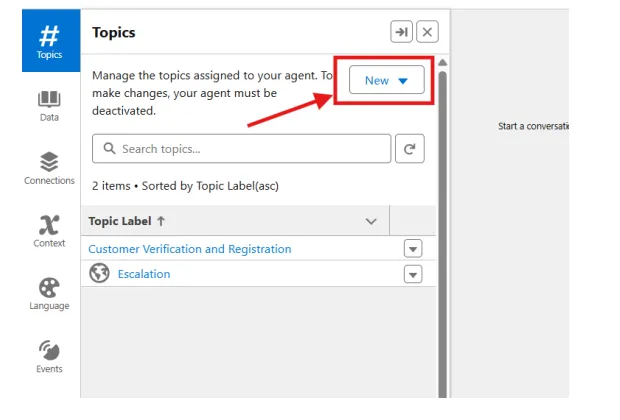
- Now click on Topic tab
- Make sure your Agent is Deactivate otherwise you won't be able to see the new button
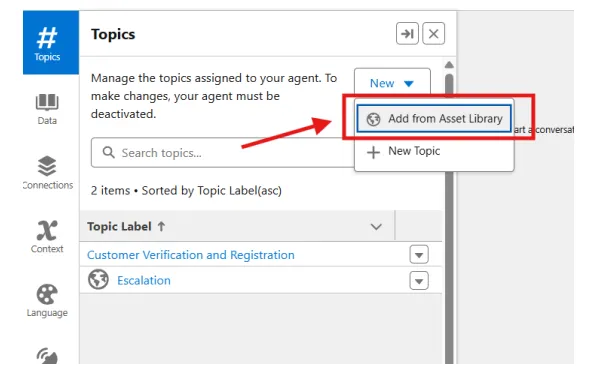
- Click on the New dropdown button
- Click on Add from Asset Library
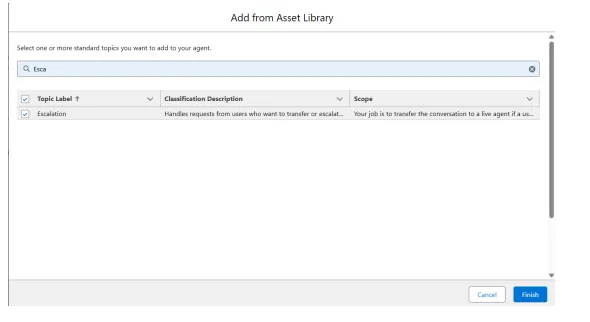
- Search for Escalation and Add the Escalation topic and click on Finish button
Step 2: Create a new Routing Configuration
- In the Quick Find box Search for Routing
- Click on Routing Configurations
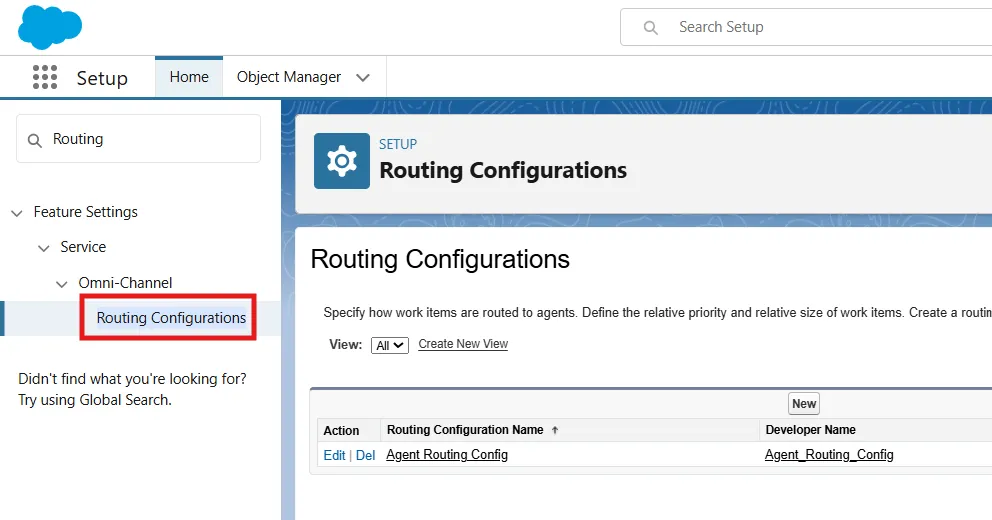
- Click on New Button
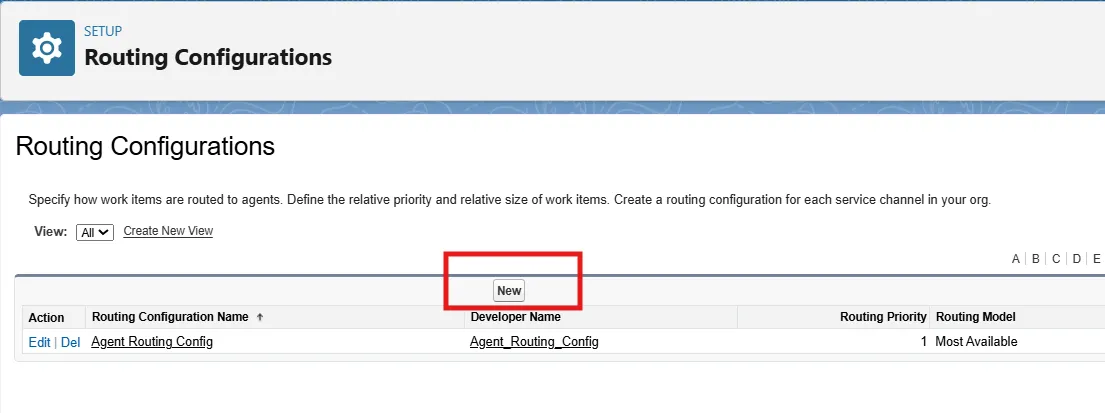
- Fill the form as following

- Click on Save button
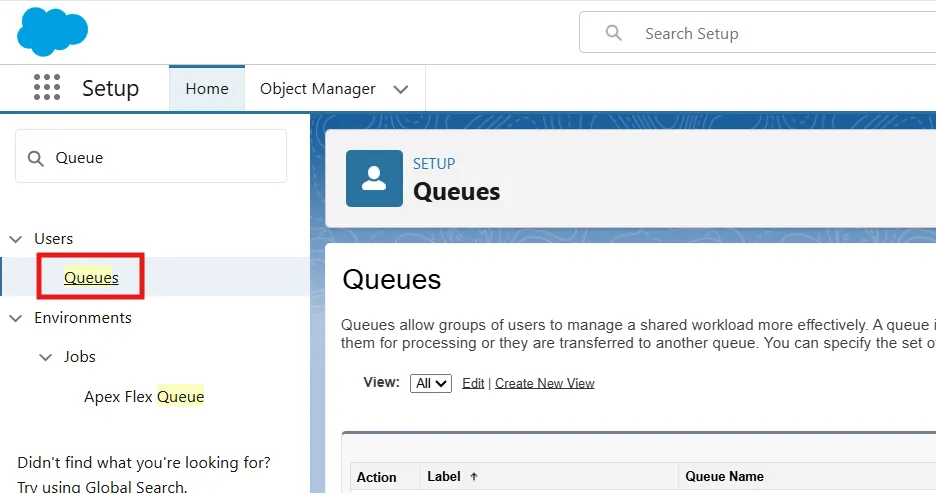
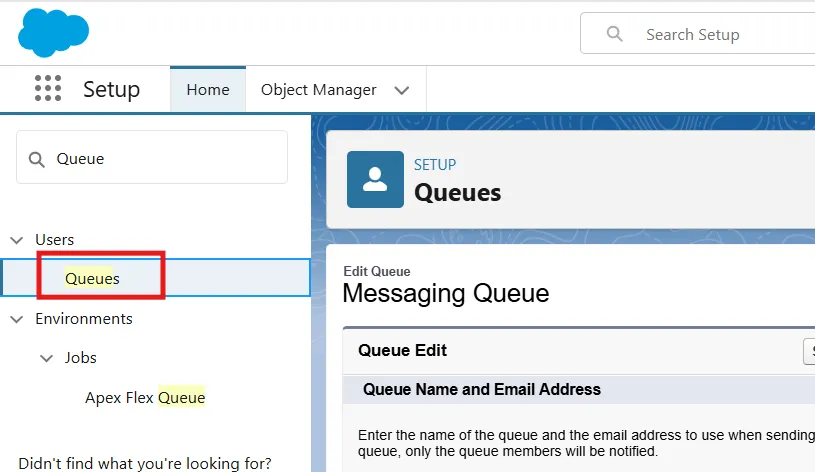
Step 3: Create a new Queue
- In the Quick Find box Search for Queue
- Click on Queues and Click on New button
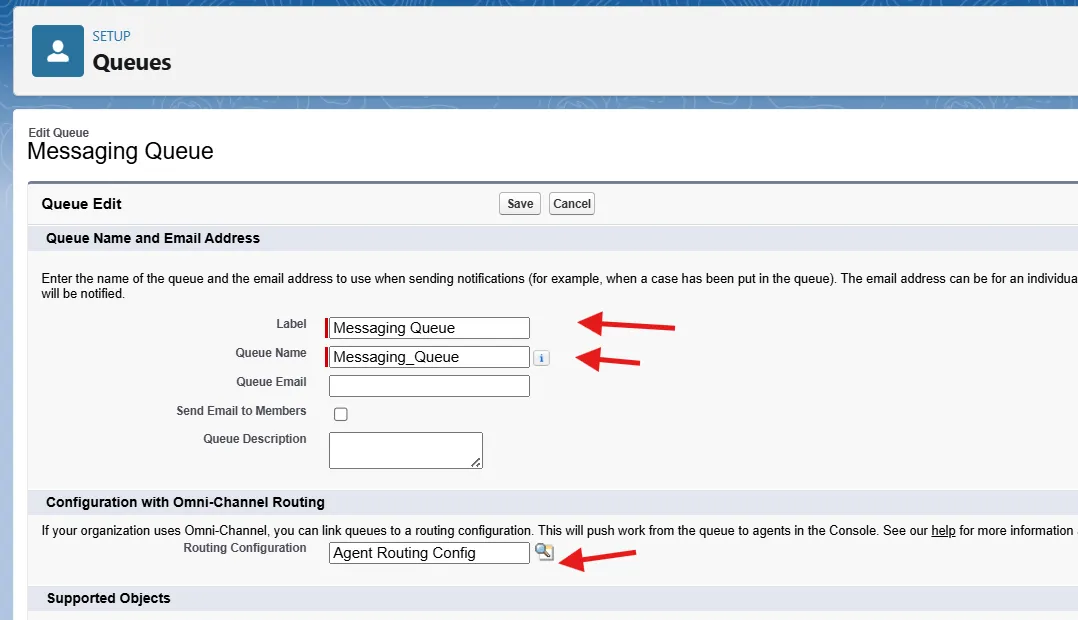
- Fill the Label and Queue Name as Messaging Queue
- In the Routing Configuration choose routing configuration which we created in Step 2
- From Available Objects choose Messaging Session and add it to Selected Objects section
- Now from Available Members choose your admin user and add it to Selected Members
- Click on Save button
Step 4: Create a new Presence Statuses
- In the Quick Find box Search for Presence status
- Click on Presence Statuses
- Click on New button
- Create 2 records like below
- One for Available
- Second for Away
- Click on Save button
Step 5: Create a new Permission Set and Assign Presence Statuses
- In the Quick Find box Search for Permission Set
- Click on Permission Sets
- Click on New button
- Fill the form like below
- Click on Save button
- Scroll down and find Service Presence Statuses Access under Apps
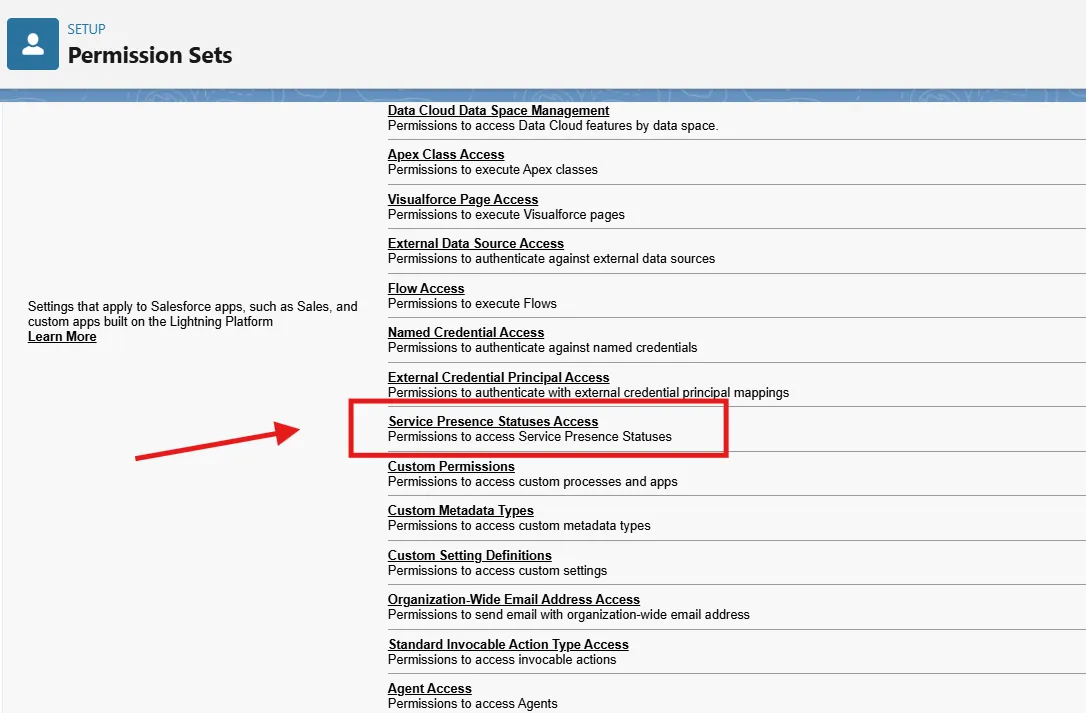
- Click on Service Presence Statuses Access
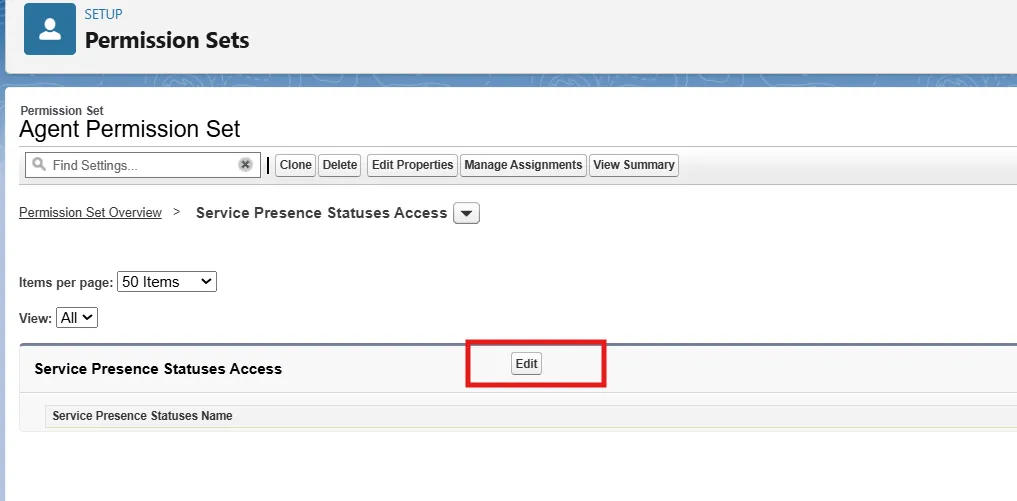
- Click on Edit
- Choose Available and Away from Available Service Presence Statuses to Enabled Service Presence Statuses
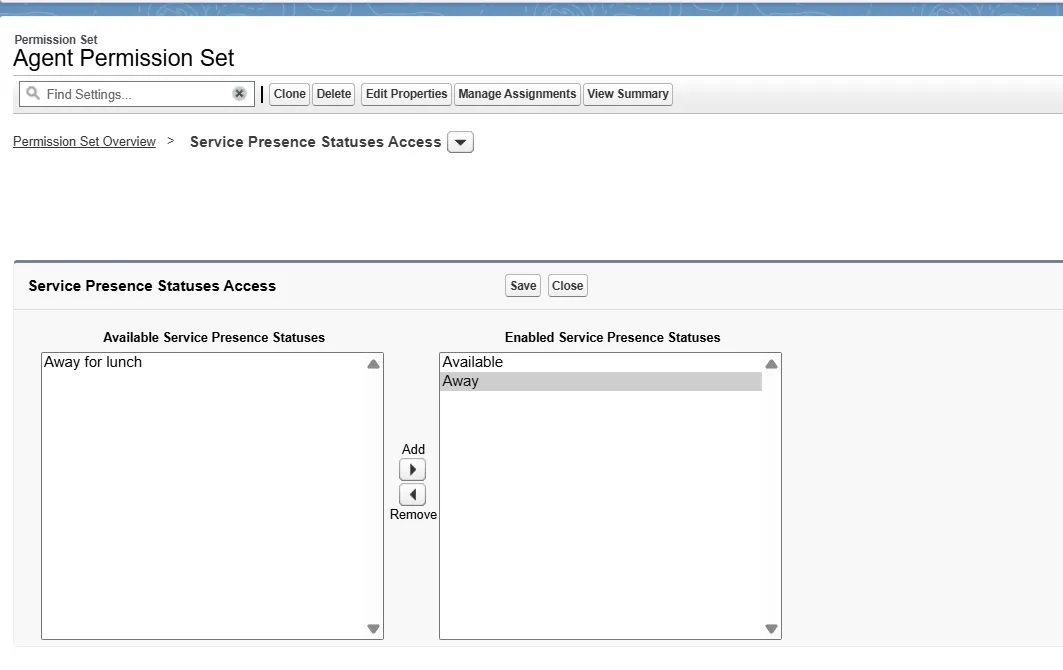
- Click on Save button
- Now Assign this Permission Set to your system admin user
Step 6: Enable user for Service Cloud
- In the Quick Find box Search for Users
- Choose you user from the list
- Click on Edit
- Enable the Service Cloud User Checkbox
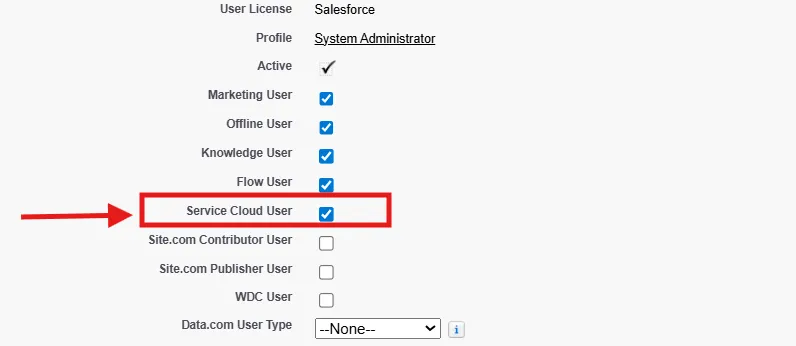
- Click on Save button
Step 9: Create Flow and Add it to existing Agent
Free newsletter
Get Salesforce insights delivered weekly
Join 500+ Salesforce professionals and stay ahead of the curve.
No spam. Unsubscribe any time.
For Inbound Connection in Agent
- Creating Omni-channel Flow for Inbound
- In the Quick Find box Search for flows
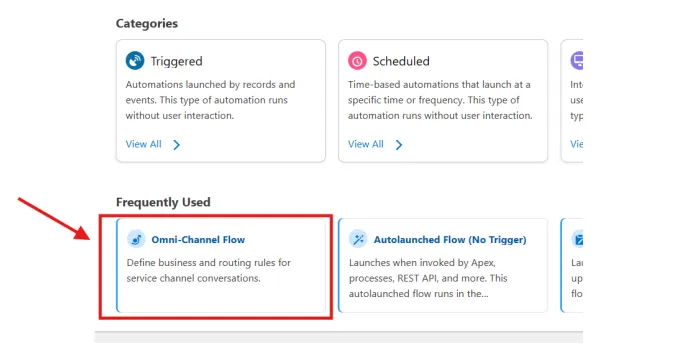
- Click on New Flow button
- Click on Omni-channel flow
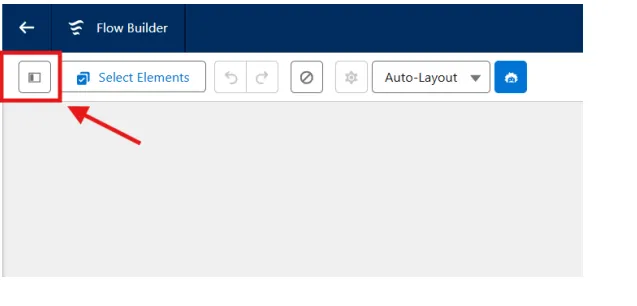
- Click on Toggle Toolbox
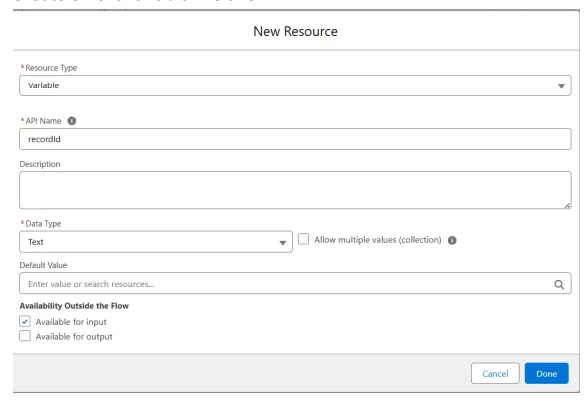
- Create a Text variable like this
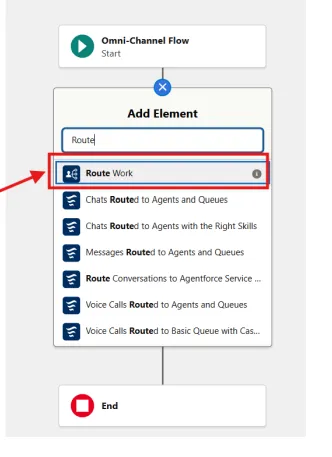
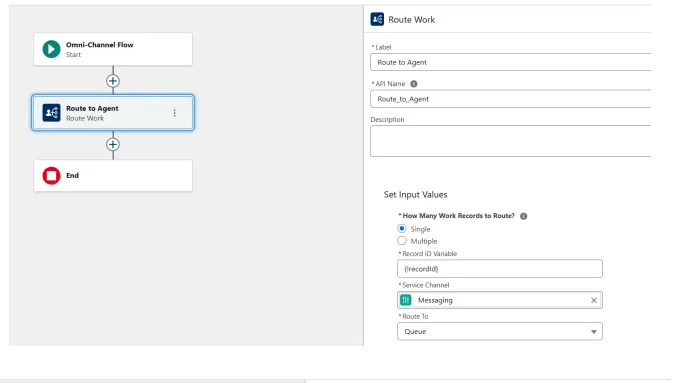
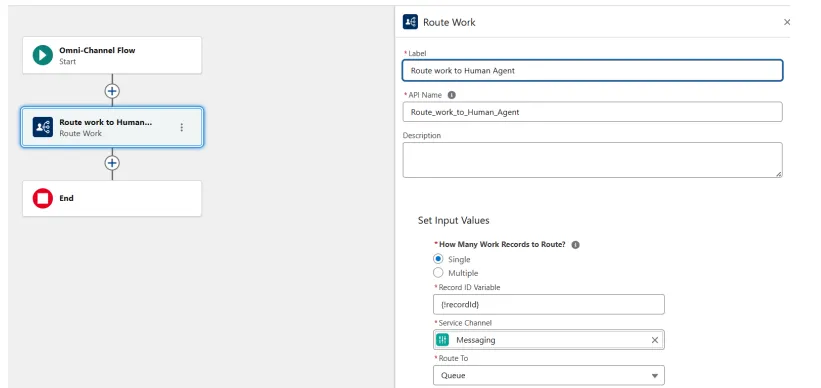
- Now Click on Add Element and Search for Route
- Select Route Work
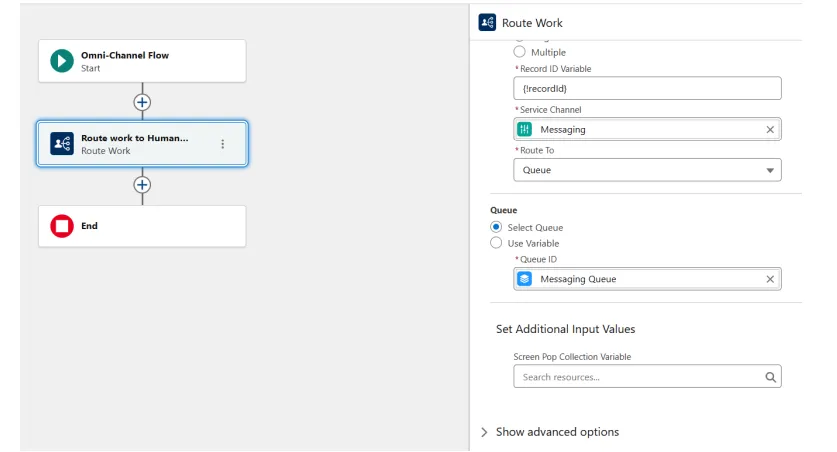
- Fill the values like below
- Save the flow and Activate it.
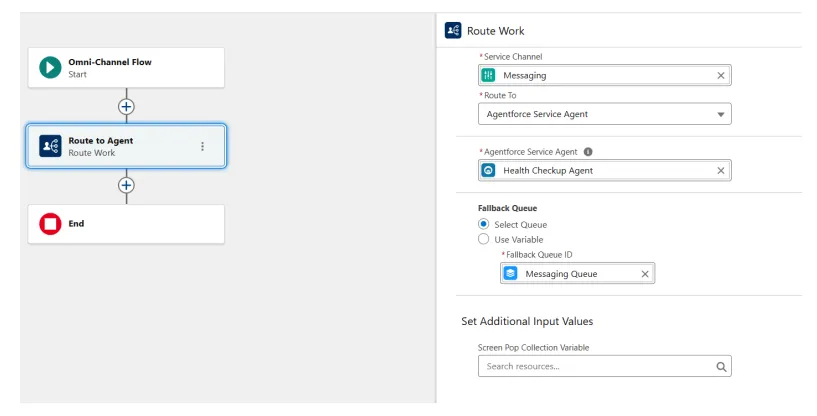
For Outbound Connection in Agent
- Follow the Inbound Flow
- After adding Route Work Element to the Flow then follow below
- Save the flow and Activate it.
Add the both Omni-Channel flows into Service Agent which you already in your org
- Go to your Agent and open it into builder by clicking on Open in Builder button
- Go to connections tab, you can see the flow which is added under the Inbound Omni-Channel Flows
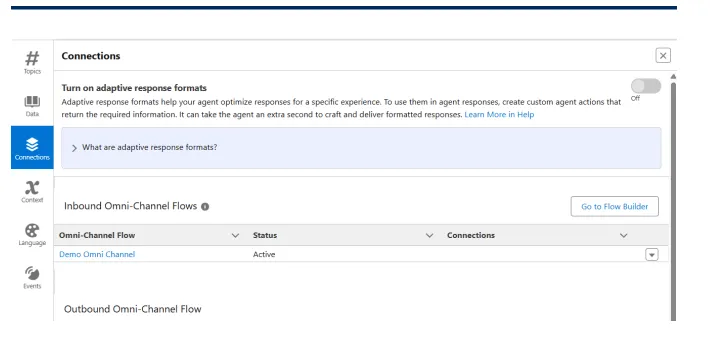
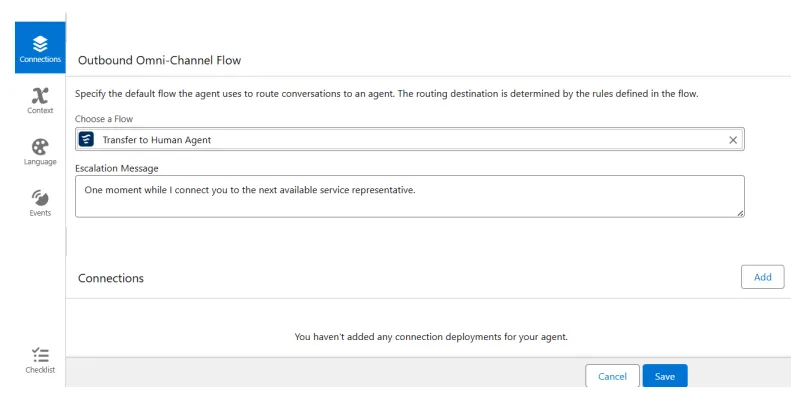
- Under Outbound Omni-Channel Flow we have to add a second flow manually
- Click on Save button
Step 10: Create a new Messaging Channel
- In the Quick Find box Search for Messaging Setting
- Click on Messaging Settings
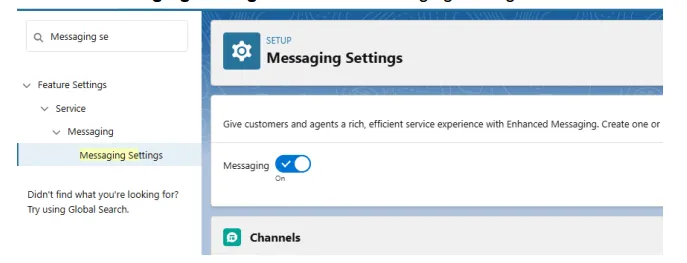
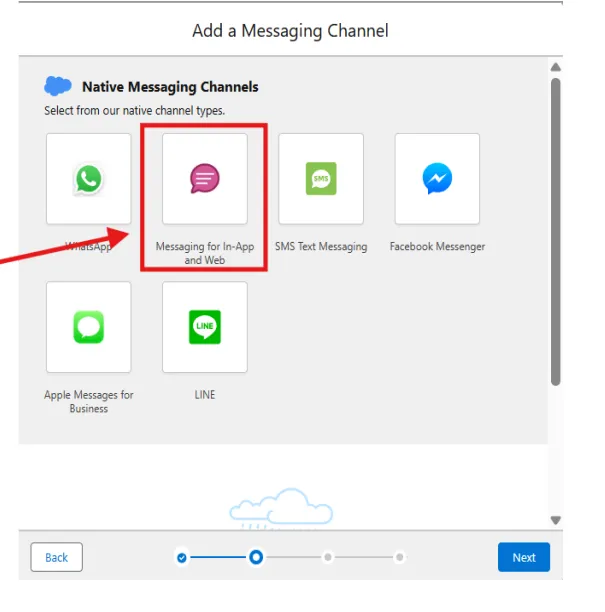
- Click on New Channel button
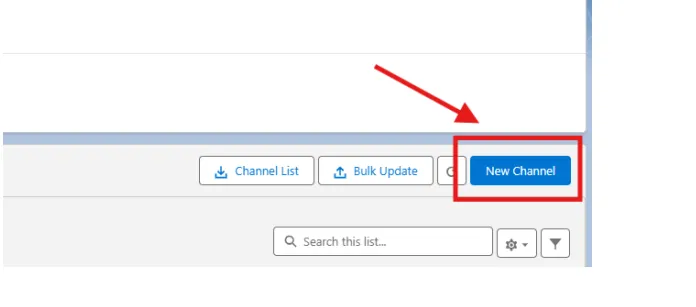
- Click on Start button
- Click on Messaging for In-App and Web
- Fill the form as following and Click on Next
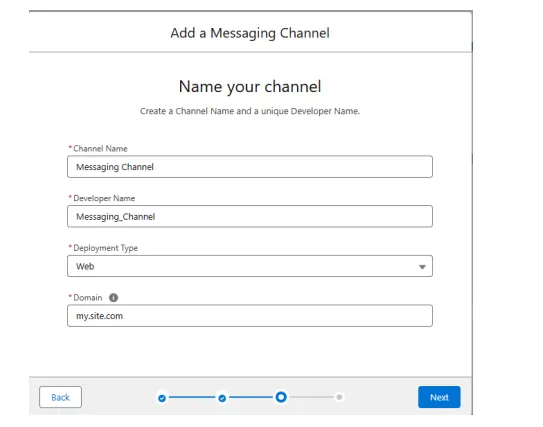
- Now fill the form as following
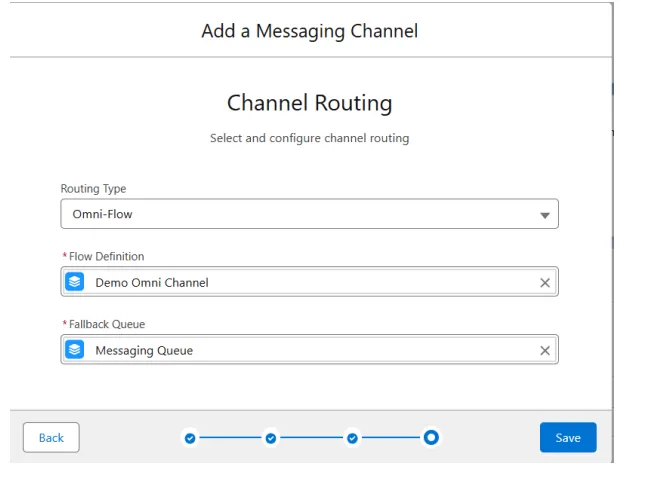
- Choose Flow and Queue of yours
- Click on Save button
Step 8: Add Omni-Channel to Service Console App
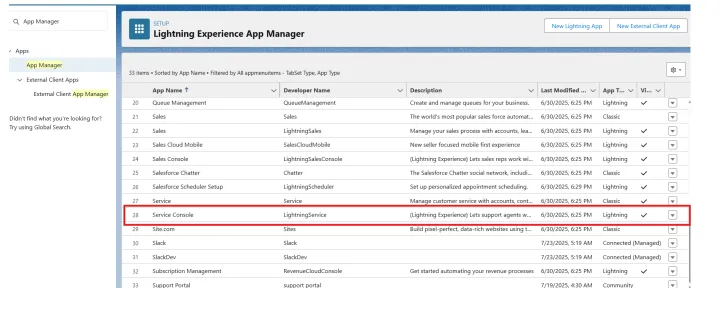
- In Quick Find box Search App Manager and Select it
- Find the Service Console App and Edit it
- Click on Utility Items (Desktop only)
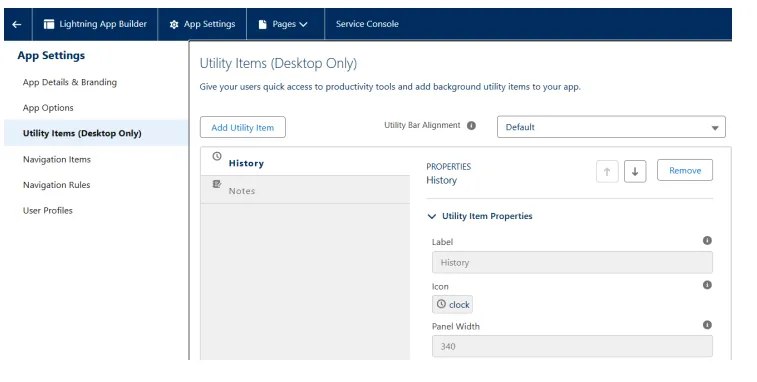
- Click on Add Utility Item button and Search for Omni-Channel
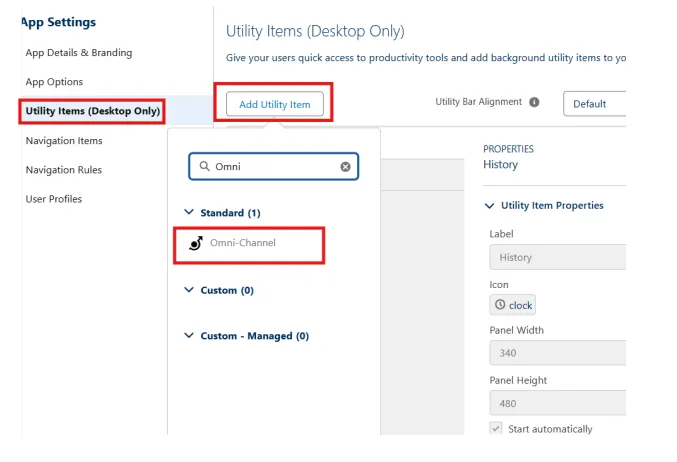
- Select Omni-Channel and It Will be add automatically
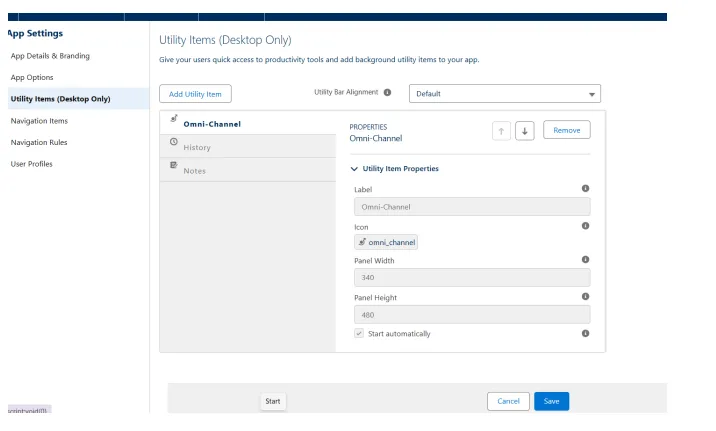
- Click on Save button
- Now Click on App Launcher and Search for Service Console
- You will see the Omni-Channel in the bottom of the page like this
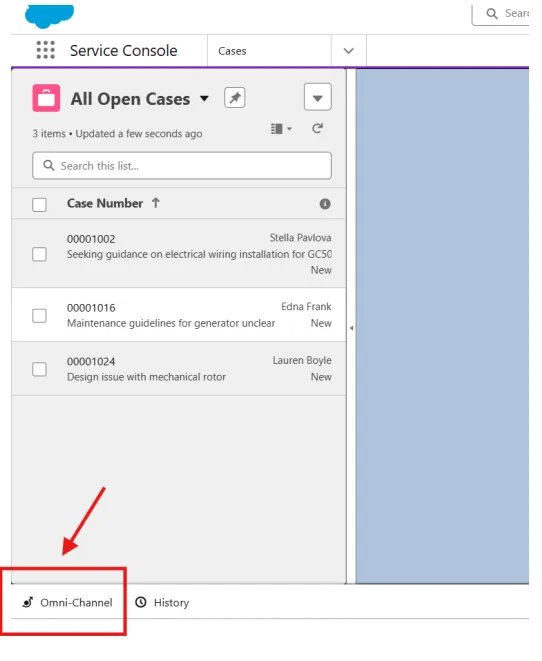
- Click on Omni-channel and make it Available

Step 10: Test the Agent to Transfer the Conversation to Live Agent
- In Quick Find box Search All Sites
- Choose your Community Site Where you added the Agent (If you are unable to add agent to community site then follow this blog)
- Click on Bot icon in right bottom
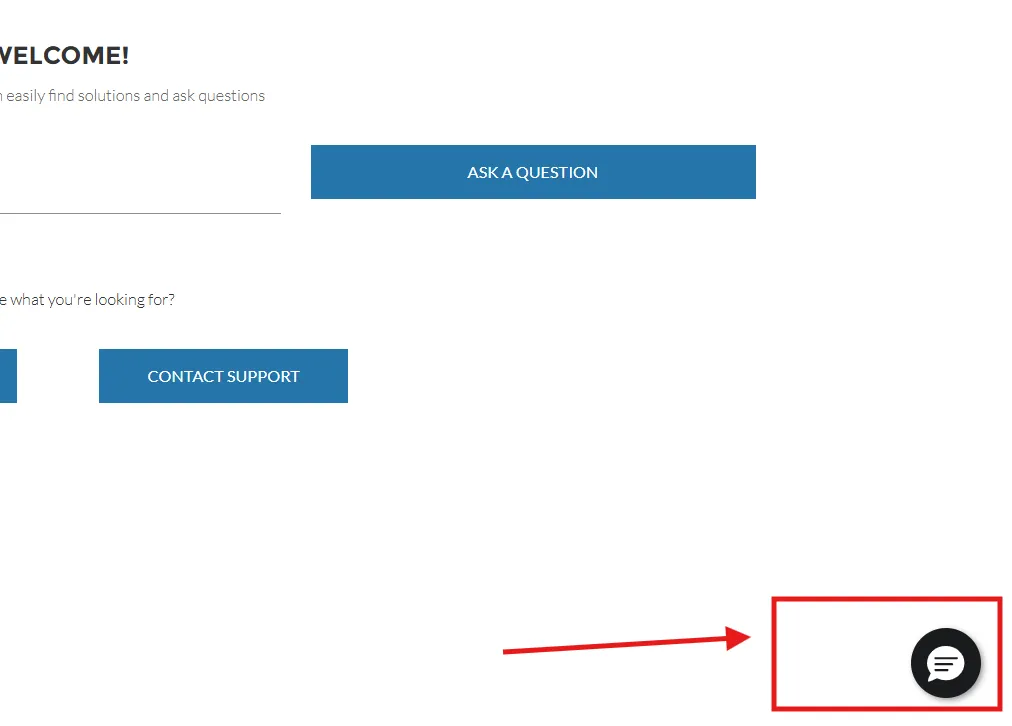
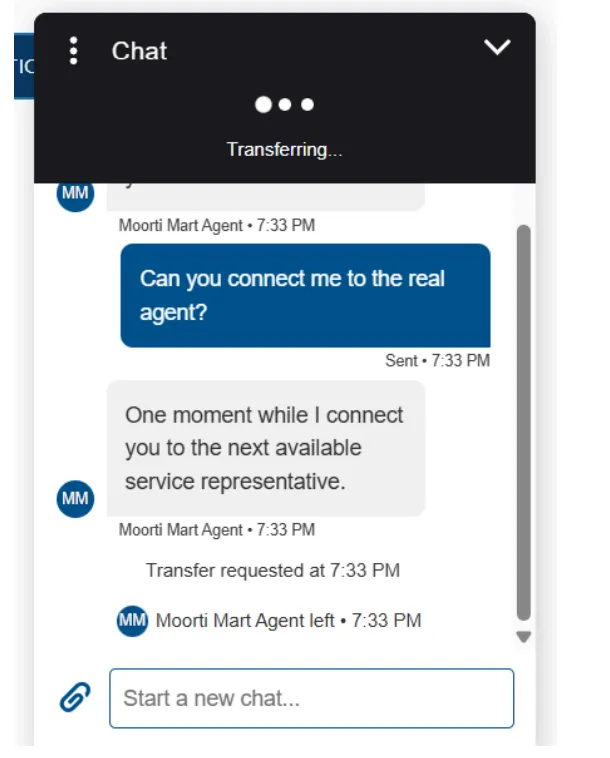
- As an End User asks an Agent , "Can you connect me to a real agent?"
- Agent will Transfer the conversation to live agent
- The Live Agent will receive the request in the Service console Omni-channel
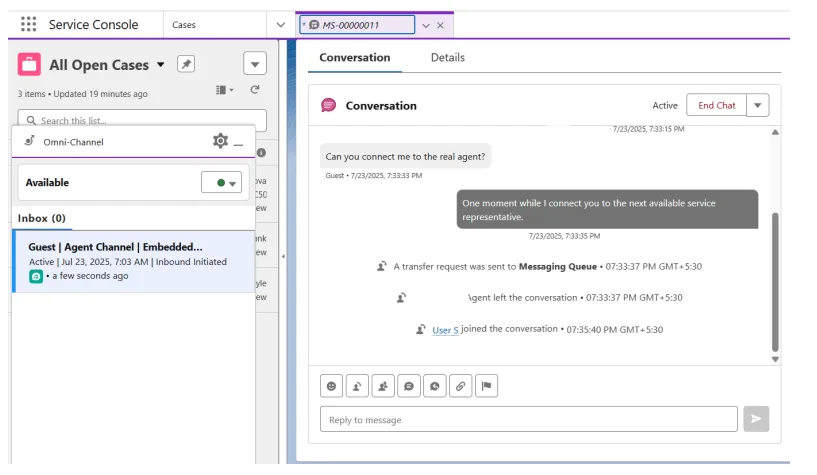
- Now we can communicate with the live Agent.
Conclusion
Transferring an Agentforce AI Agent in Salesforce is a streamlined process that ensures seamless continuity in service operations. Whether you're reassigning agents due to workload balancing or managing transitions across departments, Salesforce provides the tools to handle these changes efficiently. By leveraging built-in capabilities like Omni-Channel, Service Territories, and AI-powered routing, businesses can maintain high levels of customer satisfaction while optimizing resource utilization. Mastering this process not only improves team agility but also enhances the overall service experience delivered to customers.
Related Articles
Ready to implement? Learn more about our Agentforce Implementation Services.