Hey there! In this blog post, we'll create simple generate soical post component using LWC, Apex and Prompt Template. To generate social media posts we need to setup of advanced Prompt Template. We'll use Connect API in apex to execute a Prompt Template. After that we'll call apex method inside lightnin web component.
Here what step we'll do follow:
- Create an Advanced Prompt Template.
- Execute the Prompt Template in apex using Connect API.
- Check the code from "Execute Anonymous Window".
- Create a LWC component to Generative AI.
- Last is Add LWC component on record page.
1. First create Advanced Prompt Template
-
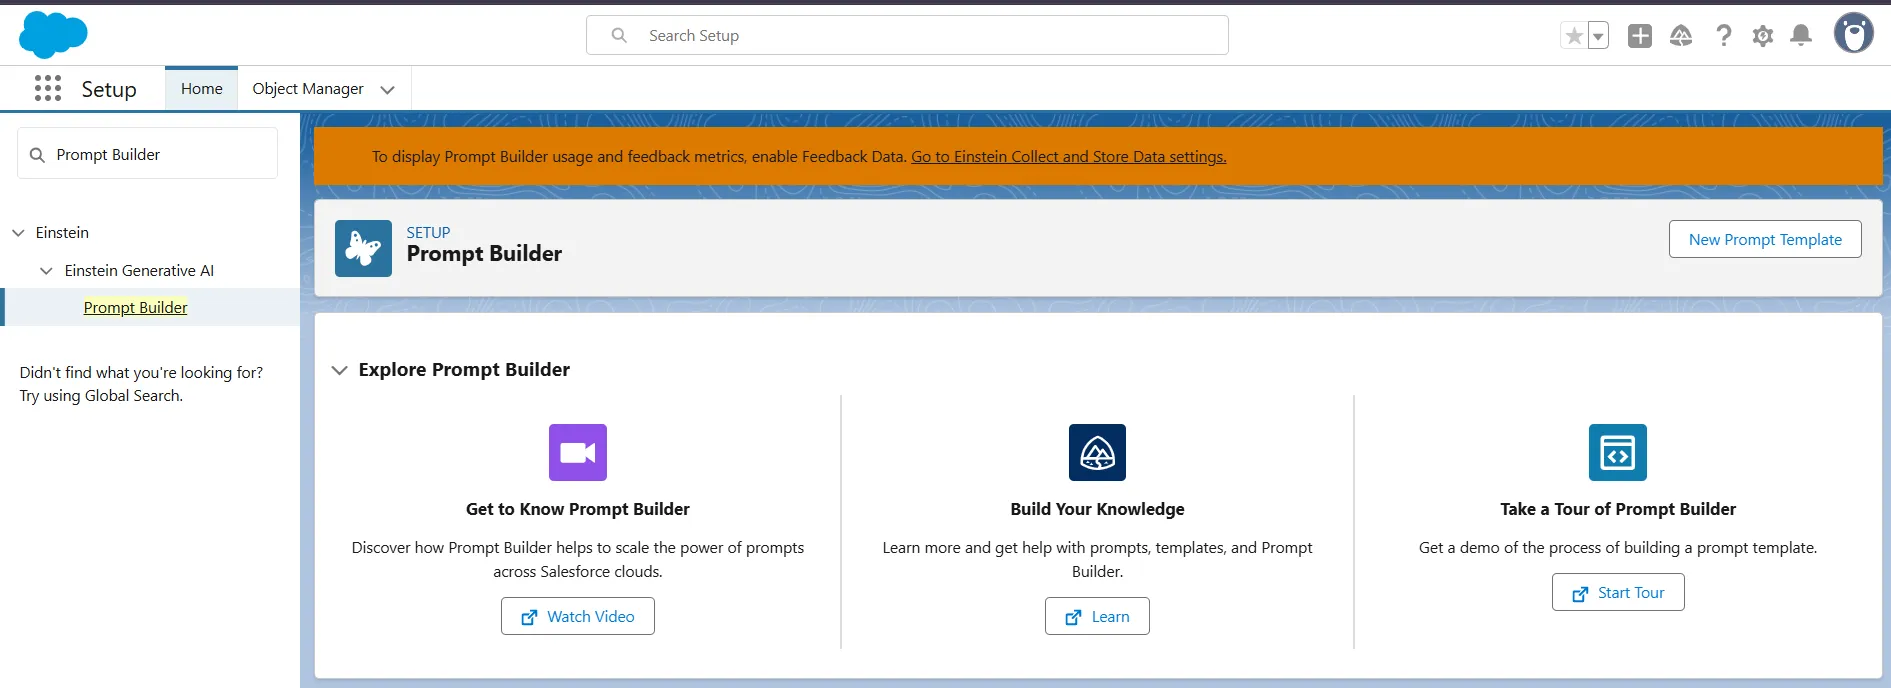
Click on setup. In quick find, enter Prompt Builder and click on Prompt Builder.
-
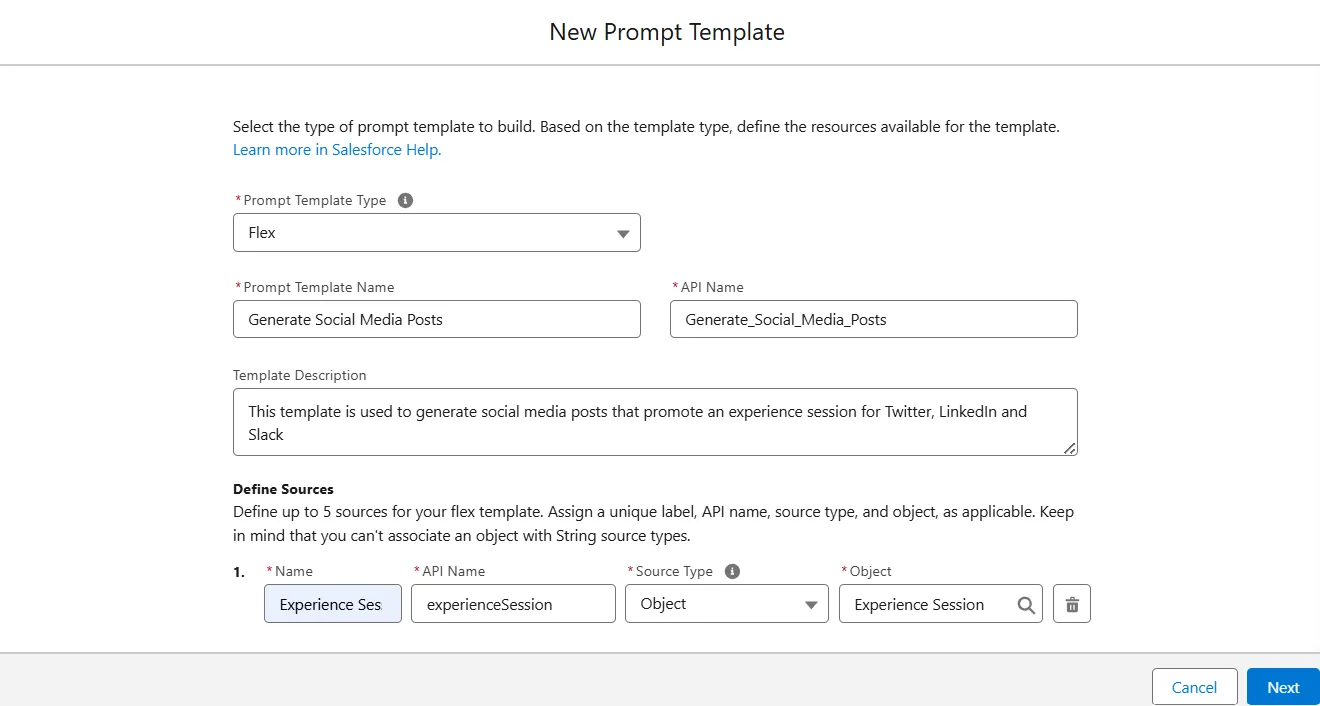
Click on New Prompt Template.
-
Configure the prompt template as follows:
- Enter Flex in Prompt Template Type.
- Enter Generate Social Media Posts in Prompt Template Name.
- Api Name automatically will be apear.
- Add Template Description as you wish.
-
In Define resource:
- Enter Experience Session in Name.
- Enter experienceSession in Api Name.
- Select Experience Session object.
-
Add the below text in Prompt Template
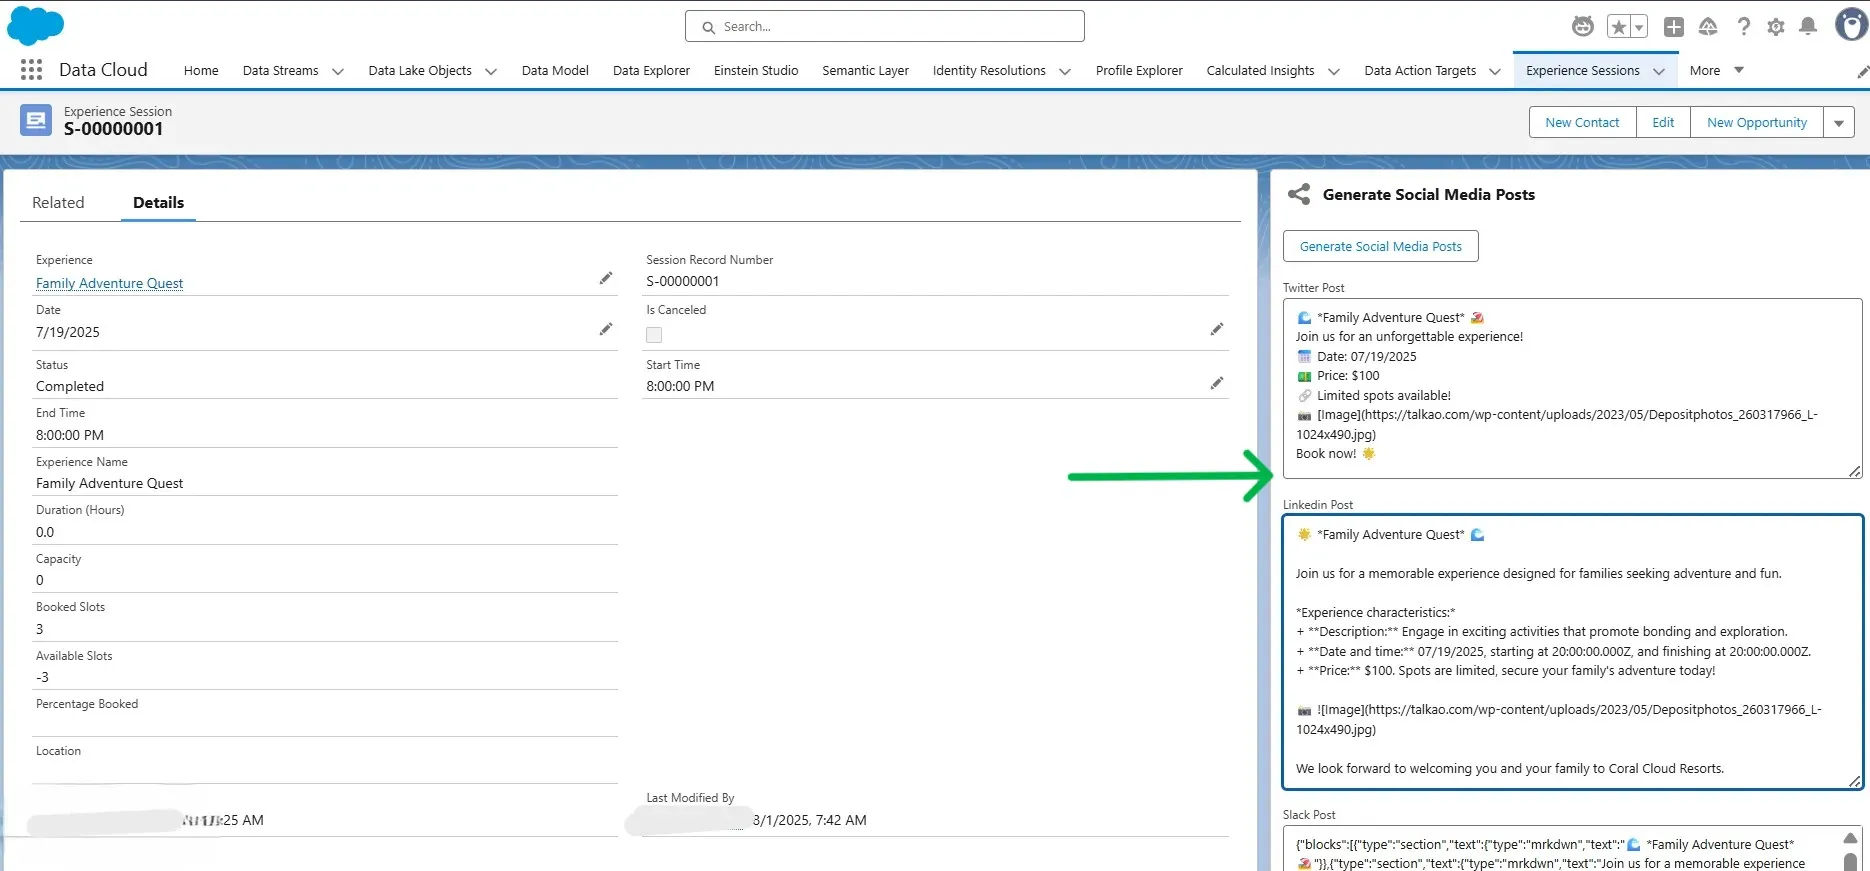
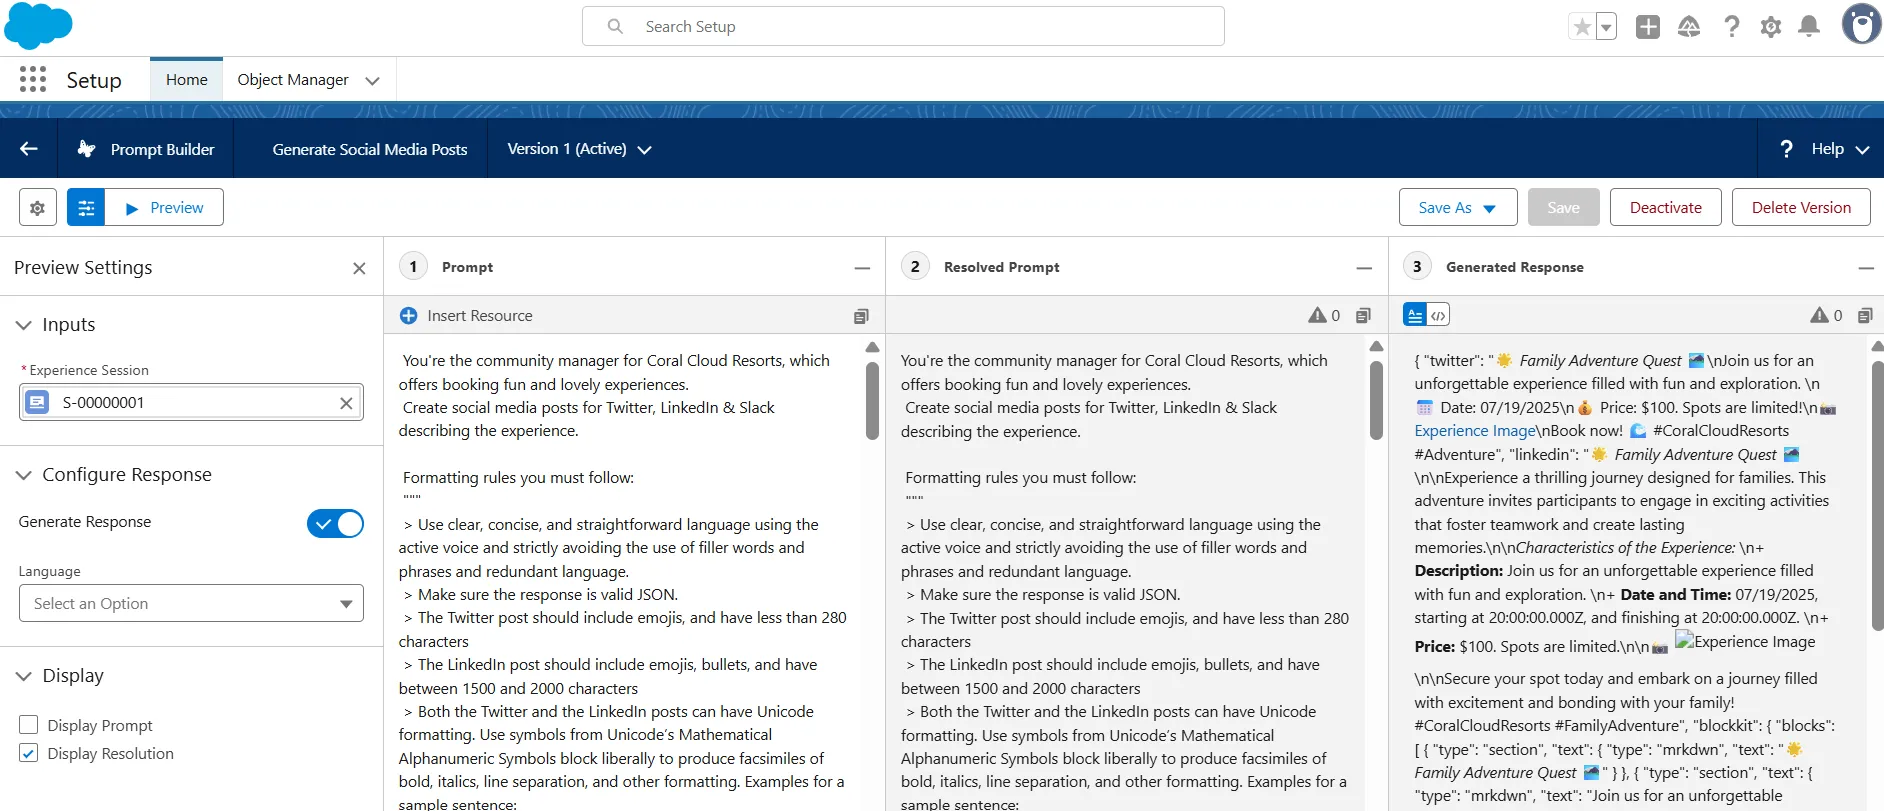
You're the community manager for Coral Cloud Resorts, which offers booking fun and lovely experiences. Create social media posts for Twitter, LinkedIn & Slack describing the experience. Formatting rules you must follow: """ > Use clear, concise, and straightforward language using the active voice and strictly avoiding the use of filler words and phrases and redundant language. > Make sure the response is valid JSON. > The Twitter post should include emojis, and have less than 280 characters > The LinkedIn post should include emojis, bullets, and have between 1500 and 2000 characters > Both the Twitter and the LinkedIn posts can have Unicode formatting. Use symbols from Unicode’s Mathematical Alphanumeric Symbols block liberally to produce facsimiles of bold, italics, line separation, and other formatting. Examples for a sample sentence: italics sans: 𝘛𝘩𝘦 𝘘𝘶𝘪𝘤𝘬 𝘉𝘳𝘰𝘸𝘯 𝘍𝘰𝘹 𝘑𝘶𝘮𝘱𝘦𝘥 𝘖𝘷𝘦𝘳 𝘵𝘩𝘦 𝘭𝘢𝘻𝘺 𝘥𝘰𝘨. bold sans: 𝗧𝗵𝗲 𝗤𝘂𝗶𝗰𝗸 𝗕𝗿𝗼𝘄𝗻 𝗙𝗼𝘅 𝗝𝘂𝗺𝗽𝗲𝗱 𝗢𝘃𝗲𝗿 𝘁𝗵𝗲 𝗹𝗮𝘇𝘆 𝗱𝗼𝗴. bold italic sans: 𝙏𝙝𝙚 𝙌𝙪𝙞𝙘𝙠 𝘽𝙧𝙤𝙬𝙣 𝙁𝙤𝙭 𝙅𝙪𝙢𝙥𝙚𝙙 𝙊𝙫𝙚𝙧 𝙩𝙝𝙚 𝙡𝙖𝙯𝙮 𝙙𝙤𝙜. italics serif: 𝑇ℎ𝑒 𝑄𝑢𝑖𝑐𝑘 𝐵𝑟𝑜𝑤𝑛 𝐹𝑜𝑥 𝐽𝑢𝑚𝑝𝑒𝑑 𝑂𝑣𝑒𝑟 𝑡ℎ𝑒 𝑙𝑎𝑧𝑦 𝑑𝑜𝑔. > The block kit code should be valid block kit code for Slack. Example of block kit code: { "blocks": [ { "type": "section", "text": { "type": "mrkdwn", "text": "🌴 *Tropical Snorkel Adventure* 🐠" } }, { "type": "section", "text": { "type": "mrkdwn", "text": "Swim alongside colorful marine life in our coral-rich tropical waters on this guided snorkeling tour.\n\n *Experience characteristics:*" }, "accessory": { "type": "image", "image_url": "{!$Input:experienceSession.Experience__r.Picture_URL__c}", "alt_text": "alt text for image" } }, { "type": "divider" }, { "type": "section", "text": { "type": "mrkdwn", "text": "• Swim alongside colorful marine life in our coral-rich tropical waters on this guided snorkeling tour." } }, { "type": "section", "text": { "type": "mrkdwn", "text": "• Date: 3/11/2024, starting at 16:00, and finishing at 20:00." } }, { "type": "section", "text": { "type": "mrkdwn", "text": "• Price: $50. Spots are limited, secure your spot today! 🏖️" } }, { "type": "divider" }, { "type": "divider" }, { "type": "actions", "elements": [ { "type": "button", "text": { "type": "plain_text", "text": "Book Experience", "emoji": true }, "value": "click_me_123", "url": "https://coralclouds.com/book/{!$Input:experienceSession.Id}" } ] } ] } """ Instructions regarding the content to generate: """ For each post: - Add a title including the name of the experience, {!$Input:experienceSession.Experience__r.Name} - Add a section including the experience characteristics, such as: + Description: {!$Input:experienceSession.Experience__r.Description__c} + Date and time: {!$Input:experienceSession.Date__c}, starting at {!$Input:experienceSession.Start_Time__c}, and finishing at {!$Input:experienceSession.End_Time__c} - Also include a link to the picture of the experience: {!$Input:experienceSession.Experience__r.Picture_URL__c}, or the picture directly in the case of the slack post. - Finally mention the price {!$Input:experienceSession.Experience__r.Price__c} and say spots are limited. The final response should have the next format: { "twitter": [here goes the twitter post], "linkedin": [here goes the linkedin post], "blockkit": [here goes the slack post] } """ Now generate the social media posts. -
Type & Select Expereince Session Record Number.
-
Click on Save & Preview, and verify the it is generating correct output.
-
Click on Active button.
2. Execute the Prompt Template in apex using Connect API
- Open Developer Console and Click on File -> New -> Apex Class -> Entere apex class name SocialMediaPostsController
SocialMediaPostsController.apxcpublic with sharing class SocialMediaPostsController {

    @AuraEnabled
    public static String generateSocialMediaPosts(String experienceSessionId) {
        // Create inputs
        Map<String, String> experienceSession = new Map<String, String>();
        experienceSession.put('id', experienceSessionId);
        ConnectApi.WrappedValue experienceSessionValue = new ConnectApi.WrappedValue();
        experienceSessionValue.value = experienceSession;
        Map<String, ConnectApi.WrappedValue> inputParams = new Map<String, ConnectApi.WrappedValue>();
        inputParams.put('Input:experienceSession', experienceSessionValue);

        // Configure invocation parameters
        ConnectApi.EinsteinPromptTemplateGenerationsInput executeTemplateInput = new ConnectApi.EinsteinPromptTemplateGenerationsInput();
        executeTemplateInput.additionalConfig = new ConnectApi.EinsteinLlmAdditionalConfigInput();
        executeTemplateInput.additionalConfig.applicationName = 'PromptBuilderPreview';
        executeTemplateInput.isPreview = false;
        executeTemplateInput.inputParams = inputParams;