Salesforce Agentforce empowers support teams to engage with customers directly across messaging channels. When integrated with Slack, it brings the power of automated messaging, live agent hand-offs, and real-time customer interactions inside Slack.
In this blog, you'll learn step-by-step how to integrate Slack with Salesforce Agentforce, from login to connecting the external app.
✅ Step 1: Login to Slack and Salesforce Agentforce
Before starting any setup:
- Log in to your Slack workspace where you'll integrate the bot.
- Open your Salesforce Org and navigate to Agentforce Builder.
✅ Step 2: Install the Slack App Package in Salesforce
Salesforce provides a dedicated Slack App to enable communication between Slack and Agentforce.
📦 Follow this Trailhead project to install the package:
👉 Connect your Agentforce Org with Slack
This package includes the necessary permissions, components, and connected app required for integration.
✅ Step 3: Connect Salesforce and Slack
You must authorize and establish the connection between your Slack workspace and Salesforce org.
🔗 Use the following official guides to complete this step:
You will connect a Slack workspace with a Salesforce org, allowing message routing and authentication to function.
✅ Step 4: Set Up and Manage Agentforce in Slack
Once connected, configure how Agentforce behaves inside Slack.
📖 Reference guide:
👉 Set up and manage Agentforce in Slack
Make sure:
- Agent permissions are correct
- Slack users can interact with Agentforce bots
- You enable message routing to agents or flows
✅ Step 5: Create a Flow in Salesforce (Auto-Launch Flow)
Free newsletter
Get Salesforce insights delivered weekly
Join 500+ Salesforce professionals and stay ahead of the curve.
No spam. Unsubscribe any time.
Now you’ll create a Flow to process user input. For example, to get contact details based on the user's email:
Example Use Case:
Auto-launched Flow that fetches Contact information using the provided email address.
Flow Components:
- Input Variable: email
- Get Records: Fetch contact record by email
- Assignment: Extract name, title, phone, etc.
- Output Variables: Return contact info to Slack
You can later use this Flow inside the agent for Slack responses.
✅ Step 6: Create an Agent in Agentforce
Now that your flow is ready, define a Agent using Agentforce Builder.
Agent capabilities:
- Process Slack interactions
- Call Flows (like the contact-fetching one)
- Trigger messages or escalate to human agents
Give it a name, define Actions/topics, and wire it to use the flow you just created.
✅ Step 7: Connect Slack to the Agentforce Agent
In Agentforce Builder:
- Go to the Connections tab
- Click Add External App
- Fill in the form:
- Connection Type: API
- Integration Name: e.g., Slack Agent
- Connected App: Slack
📸 As shown in the screenshot:
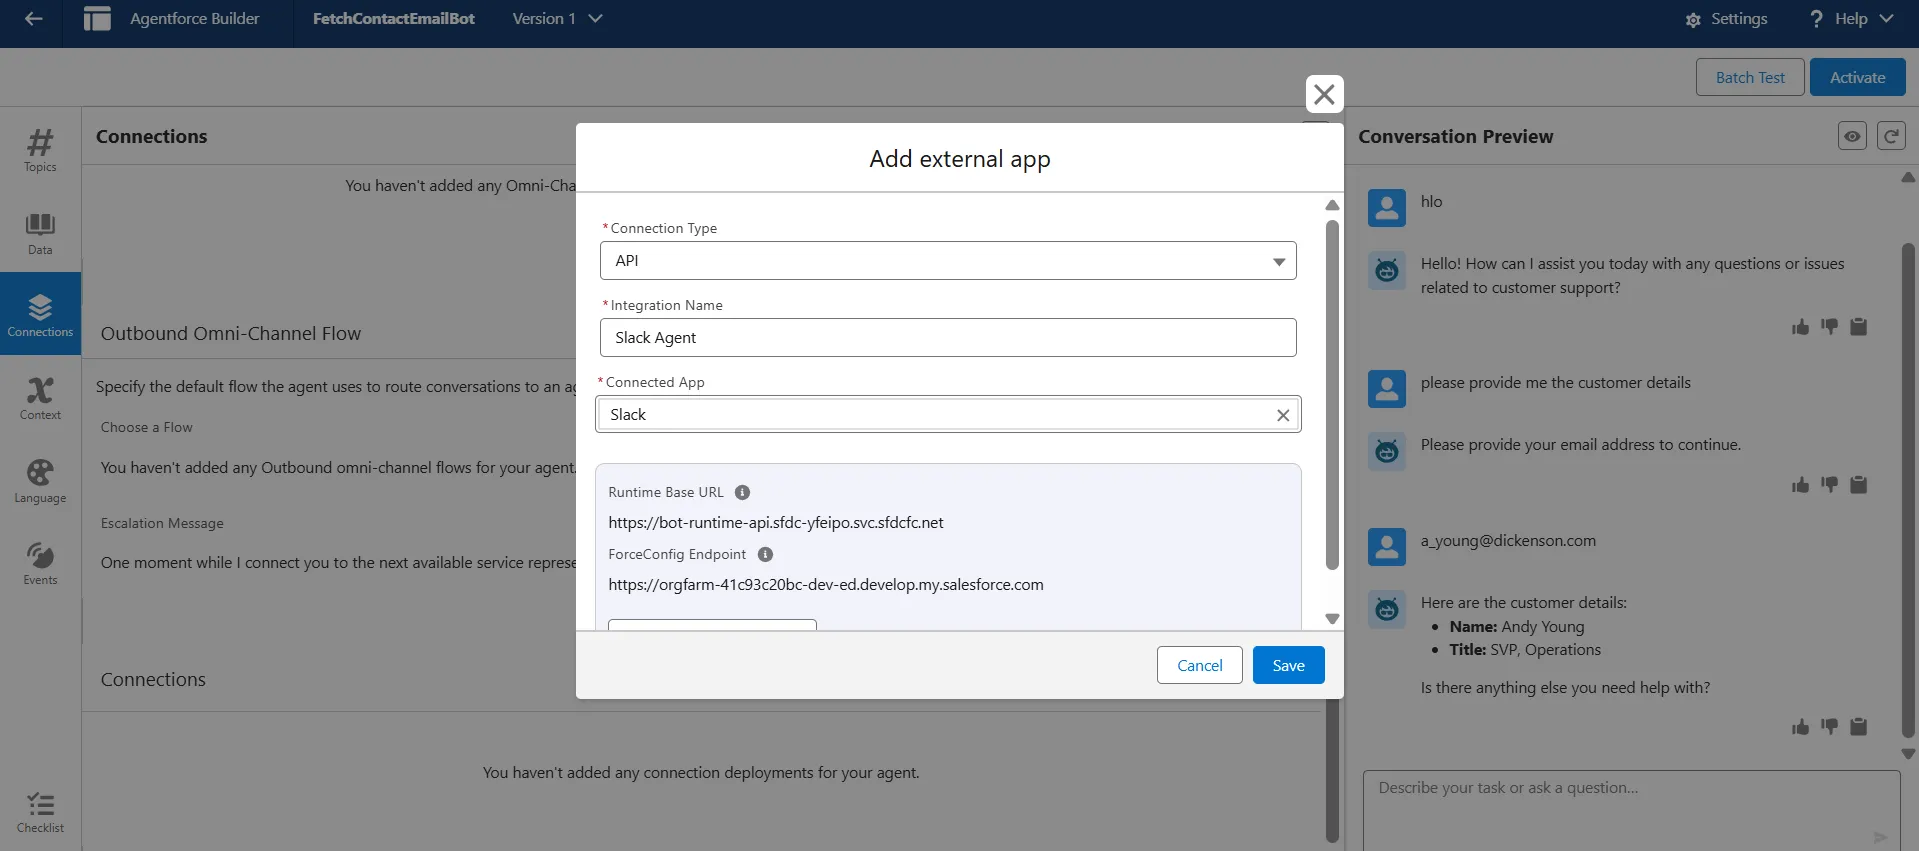
You will see a pop-up titled "Add external app", this is where you define the Slack integration.
Once saved, you’ve now fully connected your Slack workspace with your Salesforce Agentforce bot.
✅ Final Notes:
- Ensure permission sets are correctly assigned to allow Slack and Agentforce to communicate
- You can extend the agent to handle multiple flows, escalations, or topics
Related Articles
Ready to implement? Learn more about our Salesforce Data Cloud & Integration.