Getting Started with Salesforce Agentforce: Enable, Create & Deploy Service Agents
KeshavAugust 1, 2025
Salesforce Agentforce brings the power of generative AI to your customer service experience by allowing you to build intelligent AI-powered agents. These agents can handle customer conversations, automate common tasks, and escalate to human agents when needed. In this guide, we'll walk you through the complete setup process, from enabling Agentforce in your Salesforce org to deploying your Service Agent on a public-facing community site.
Need expert help with your Agentforce implementation? Phenoble's certified Agentforce specialists have deployed 40+ agents across sales and service teams. See our Agentforce services →
1. Configuring the Org to Enable Agentforce
Before you can build or deploy any AI agents, you need to enable Agentforce in your Salesforce org.
Steps to Enable Agentforce:
Go to Setup in Salesforce.
In the Setup Quick Find, search for and select Einstein Setup.
Click the Turn on Einstein toggle, and make sure Einstein is On
Refresh your browser to reload Setup.
In the Setup Quick Find, search for and select Agentforce Agents.
At the top of the Agentforce Agents page, click the Agentforce toggle, and ensure it is set to On.
Click the Enable the Agentforce (Default) Agent toggle, and ensure it is set to On.
2. How to Create a Service Agent
Create Invocable Apex class
OrderStatus.cls
publicclassOrderStatus{@InvocableMethod(label='OrderStatus' description='Return status of the order based on order number')publicstaticList<String>getStatus(List<String> orderNumbers){List<String> results =newList<String>();if(orderNumbers ==null|| orderNumbers.isEmpty()){ results.add('Error:Order number list is empty or null.');return results;}try{String orderNumStr = orderNumbers[0];Order o =[SELECTId,StatusFROMOrderWHEREOrderNumber=:orderNumStr LIMIT1]; results.add(o.Status);}catch(QueryException qe){ results.add('No order found for number ' + orderNumbers[0]);}catch(Exception e){ results.add('Error: ' + e.getMessage());}return results;}}
Create Action
Now In the Quick Find, search for and select Agentforce Assets.
Click on Agentforce Assets
Click on + New Agent Action button
Choose Reference Action Type as Apex
Choose Reference Action Category as Invocable Methods
Choose Reference Action as Order Status
Click on Next button
In the Agent Action Instruction Write "Return status of the order based on order number. For example: user provide input like this: share me the status of order number 00000100 so it should return the order status."
Loading Text as "Getting Order Details"
In the Input Section Instructions field write "Order number provided by user" and Select checkbox Require input
In the Output Section Instructions field write "show the status of the order" and Select checkbox show in conversation
Click on Finish button
Create Sample Data
Click on App Launcher and Search for Contract
Select Contracts
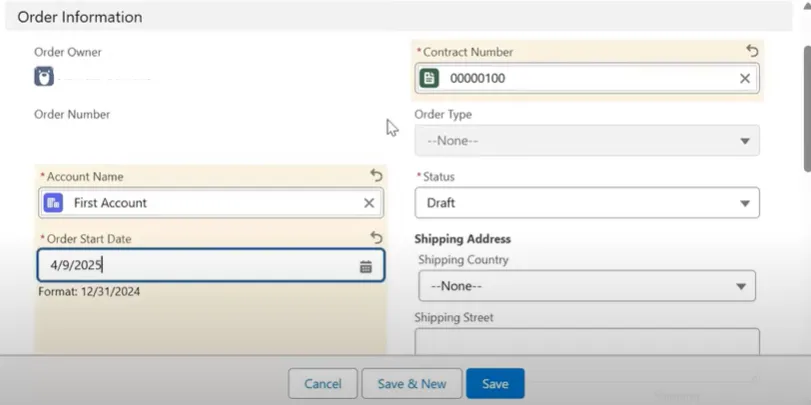
Create a Record of Contracts
Now Click on App Launcher and Search for Order
Select Orders
Create a Record of Orders
Make sure order should be linked to the contracts record like this
Setup Agent
In the Setup Quick Find, search for and select Agentforce Agents.
Click + New Agent. Note: If the New Agent button is not present, refresh the page until the button appears.
Select Agentforce Service Agent as the type.
Click Next.
On the Select your agent's topics screen, click Added next to Case Management to remove this standard topic from your agent. The button should now be +Add.
Click Added next to every topic
Click Next.
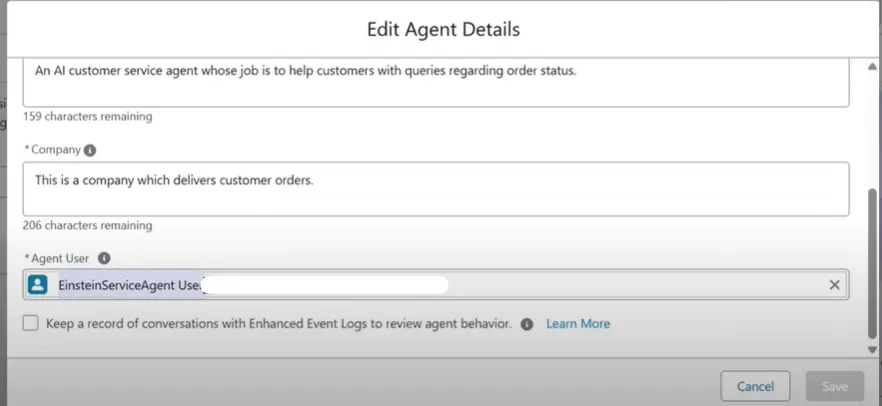
Enter the agent’s Name and API Name as follows: Name: Get Order Status Description:
Deliver personalized customer interactions with an autonomous AI agent. Get Order Status Agent intelligently supports your customers with common inquiries about the order status. Role:
An AI customer service agent whose job is to help customers with queries regarding order status. Company:
This is a company which delivers customer orders
Click on Next Button
Click on Create button
Free newsletter
Get Salesforce insights delivered weekly
Join 500+ Salesforce professionals and stay ahead of the curve.
No spam. Unsubscribe any time.
Grant Permission to Agent User
Create Permission Set named Get_Order_Status_Permissions
In the Permission Set Go to Object Setting
Find Order object and Give Read and View All Field Permission
In permission set Now Go to Apex class Access and Click on Edit
Select OrderStatus apex class from Available Apex Classes to Enabled Apex Classes
Click on Save
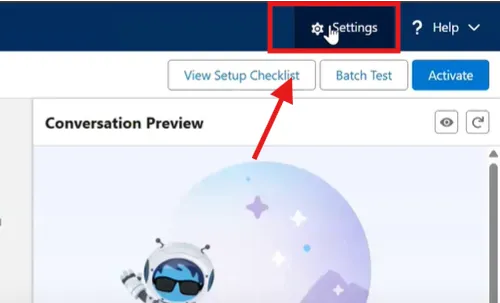
In Agentforce builder screen Click on Setting Icon!
Scroll down and Copy starting text of Agent User field like this
Search this in users list and click on user
Click on Permission Set Assignments link from top
Click on Edit Assignments
Find Get_Order_Status_Permissions permission set and move it to Enabled Permission Sets
Click on Save button
Create a New Topic in Agentforce
Go to your Agentforce Agent
Click on New button and then New Topic
In the What do you want this topic to do(Optional) fill as "This topic will call the order status invocable action and share the order status with the customer."
Click on Next button
Topic Label: Order Status
Classification Description: This topic handles inquiries related to checking the status of an order. It will guide the agent to retrieve and share the order status with the customer.
Scope: Your job is only to retrieve and provide the current status of the customer’s order. Do not attempt to handle any other types of inquiries or issues.
Instructions: If a user does not have their order number, ask for the order number in correct format
Click on Next button
Choose Order Status action
Click on Finish
Omni-channel Settings
In the Quick Find box Search for "Omni-channel Settings" and Select
Turn on Enhanced Omni-Channel Routing toggle button
Make sure Enable Omni-Channel Checkbox is check
Scroll down to bottom and Select Automatically log agents in to Omni-Channel in the new window or tab
Create Routing Configuration
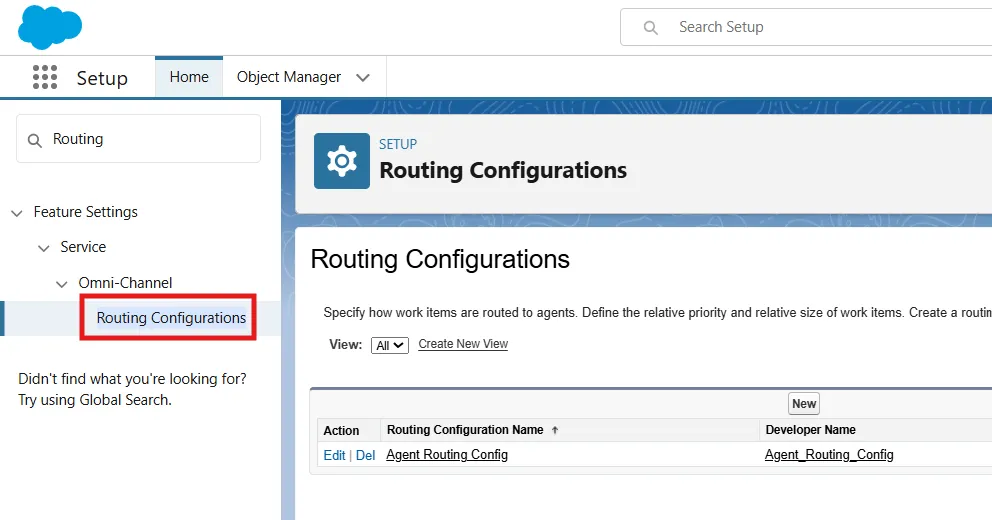
In the Quick Find box Search for Routing
Click on Routing Configurations
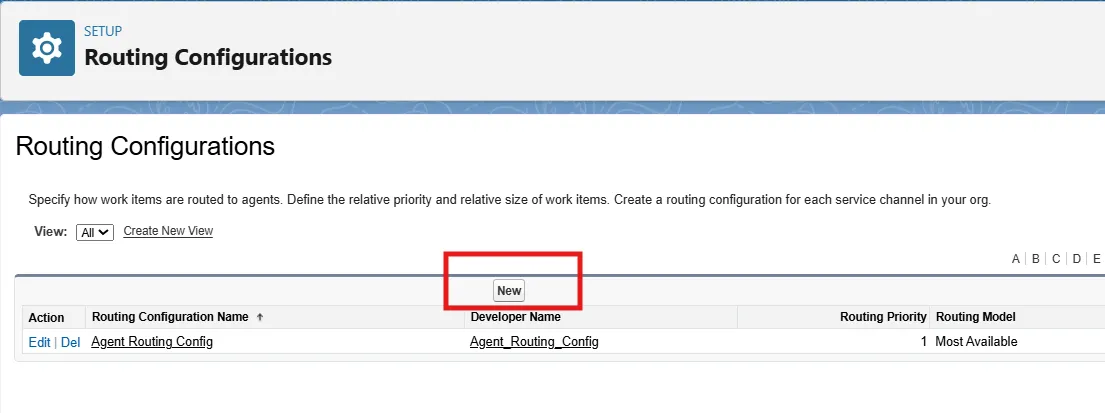
Click on New Button
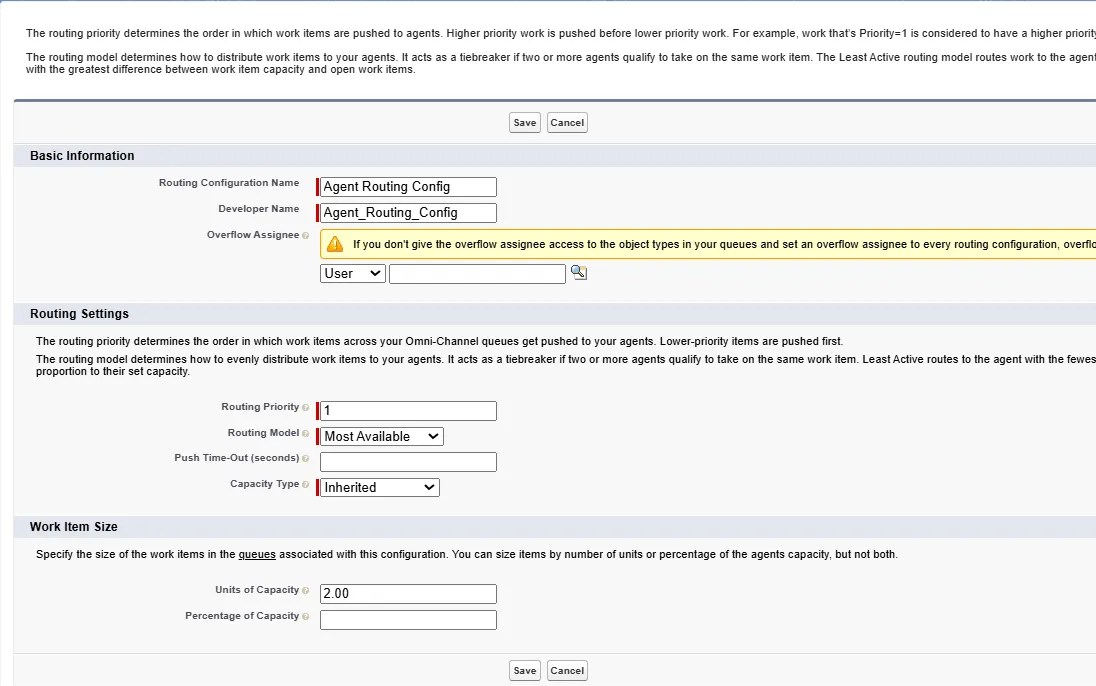
Fill the form as following
Click on Save button
Create a new Queue
In the Quick Find box Search for Queue
Click on Queues and Click on New button
Fill the Label and Queue Name as Messaging Queue
In the Routing Configuration choose routing configuration which we created in Step 2
From Available Objects choose Messaging Session and add it to Selected Objects section
Now from Available Members choose your admin user and add it to Selected Members
Click on Save button
Create the Omni-Channel Flow
Creating Omni-channel Flow for Inbound
In the Quick Find box Search for flows
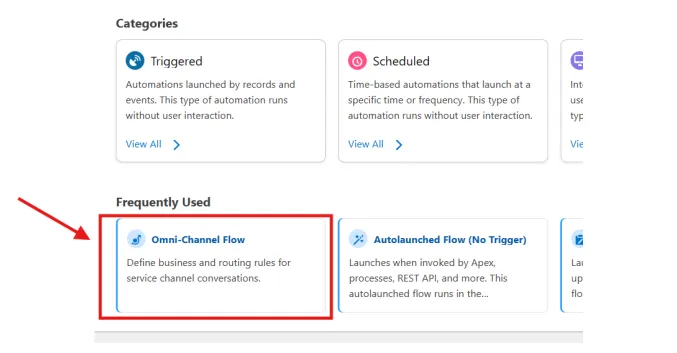
Click on New Flow button
Click on Omni-channel flow
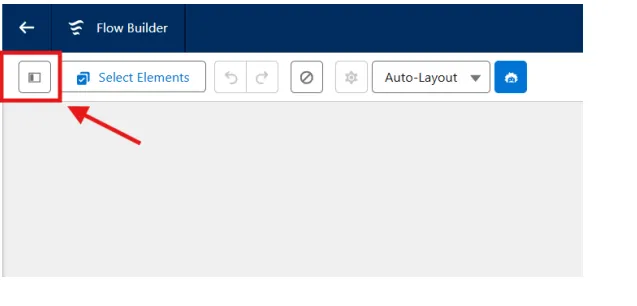
Click on Toggle Toolbox
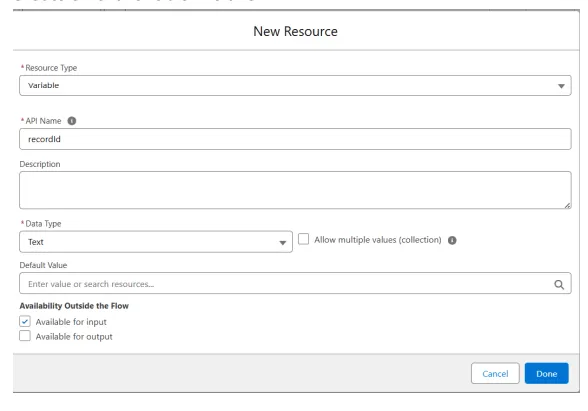
Create a Text variable like this
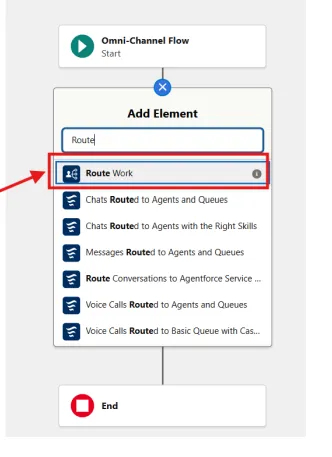
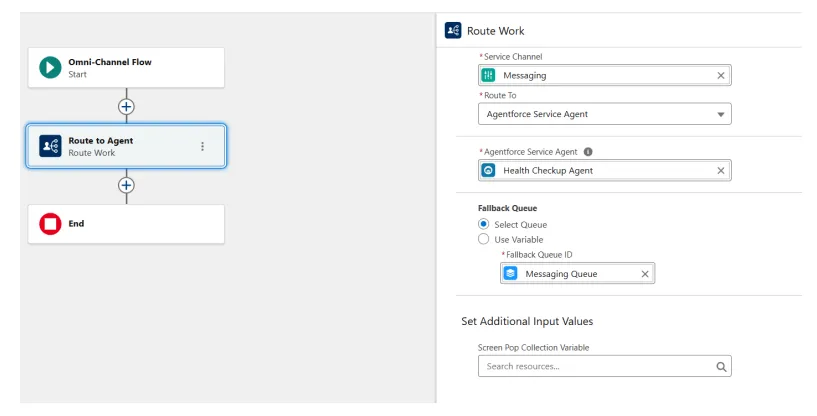
Now Click on Add Element and Search for Route
Select Route Work
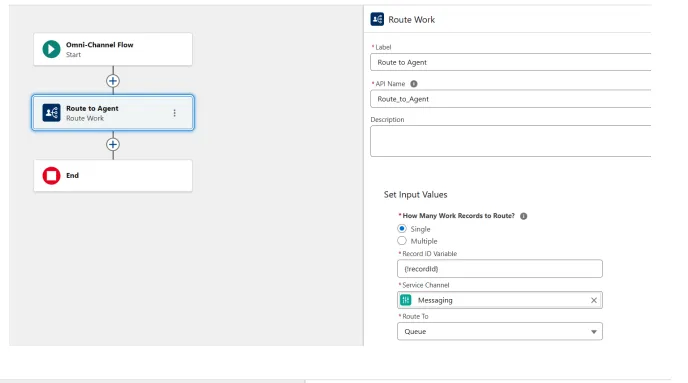
Fill the values like below
Save the flow and Activate it.
Creating Message Channel
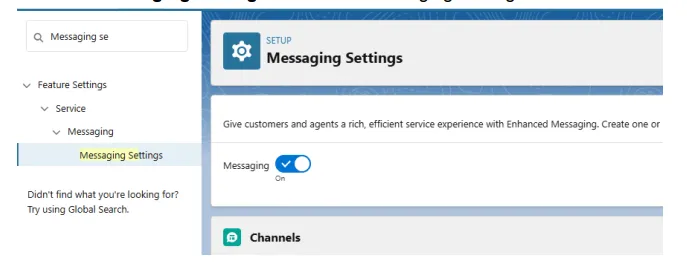
In the Quick Find box Search for Messaging Setting
Click on Messaging Settings
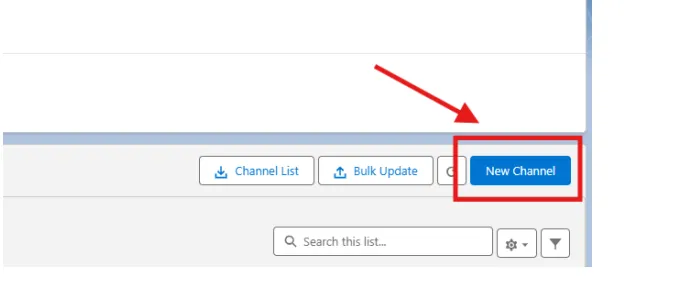
Click on New Channel button
Click on Start button
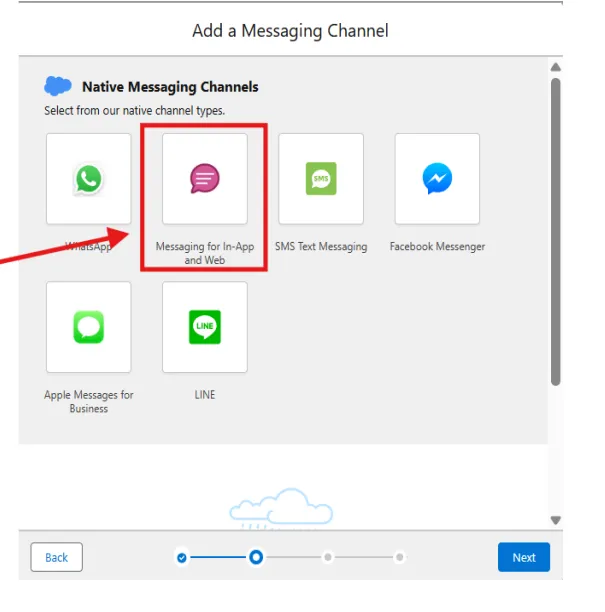
Click on Messaging for In-App and Web
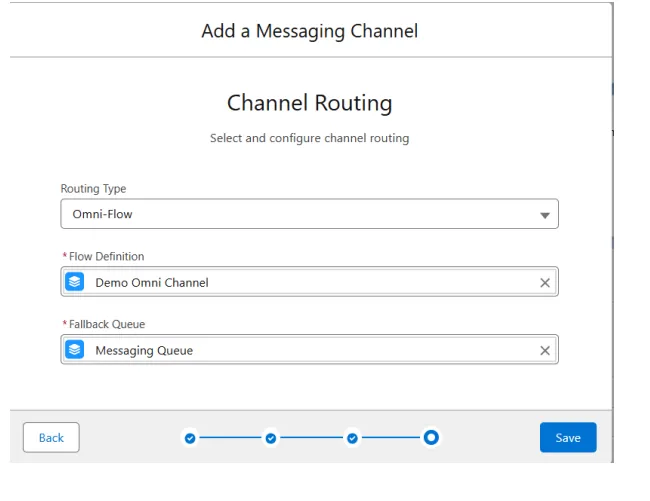
Fill the form as following and Click on Next
Now fill the form as following
Choose Flow and Queue of yours
Click on Save button
Enable Digital Experience and Embedded Service Deployments
In the Quick Find box Search for "Digital Experience"
Click on Settings
Now select the Enable Digital Experience checkbox
In the Quick Find box Search for "Embedded"
Select Embedded Service Deployments
Click on New Deployment button
Select Messaging for in-App and Web
Click on Next button
Click on Web
Click on Next button
Embedded Service Deployment Name: Order Status ESD
API Name: Auto Populate
Domain: my.site.com
Messaging Channel: Choose the Messaging Channel which we created ealier
Click on Save button
Now Click on the Publish button
Creating and Adding Agent on Site
Go to the All Site
Click on New button
Choose Customer Service Template
Click on Get Started button
Give it a Name and URL and Click on Create button
Select the Administration section
Click on Settings
Click on Activate button
Now go to the builder
Click on Components button
Search for Embedded Messaging
Drag & Drop Embedded Messaging to the Page anywhere
Now Click on Publish and again click on publish button
Click on Got it button
In the Quick Find box search for Embed
Select Embedded Service Deployments
Open the record which we created earlier
Under the Settings click on Edit Settings
Search for Show Typing Indicators and Enable this
In the Quick Find box search for CORS
Under Allowed Origin List click on New button
Origin URL pattern: https://*.my.site.com
Click on Save button
Now Go to the All site and Open newly created Community Site
You will see the bot Icon, click on that
Now Test your agent
Congratulations you have successfully created and deployed your AI Agent to the Community Site!