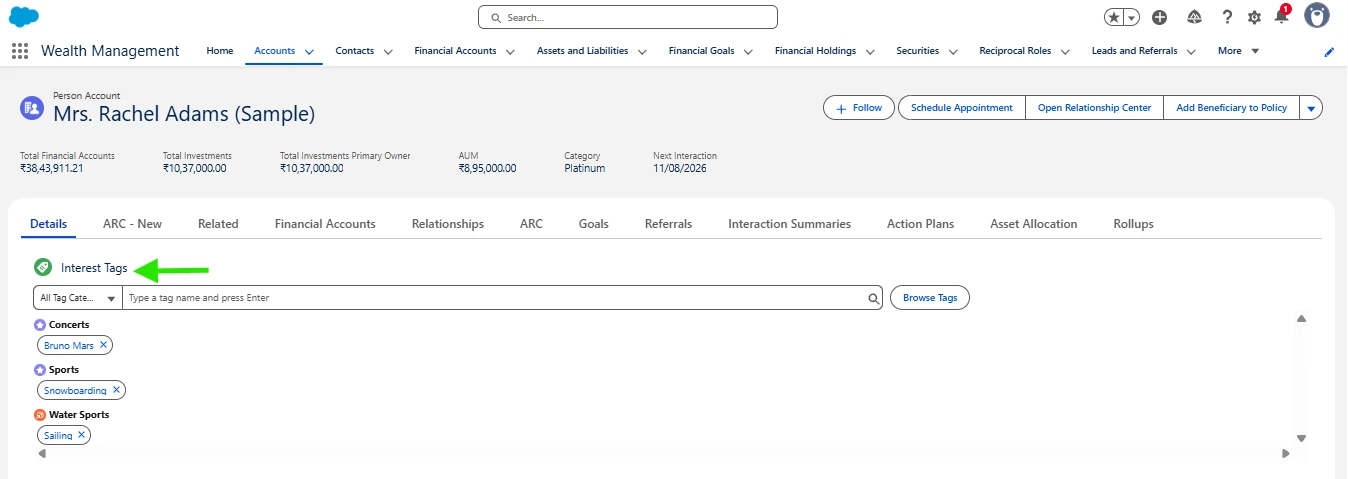
In this blog, you will learn how to add the Interest Tags component to record pages in Financial Services Cloud, enabling advisors to easily view and manage client interests directly within account profiles. By placing the Interest Tags component on the Profile tab, you give advisors quick access to client preferences, making conversations more personalized and meaningful. This setup not only streamlines the user experience but also ensures that Interest Tags are integrated seamlessly into your day-to-day workflow.
Following the step-by-step process, you’ll see how to use the Lightning App Builder to configure the component, save your changes, and instantly make it available on account record pages. Whether you are an admin setting up the framework or an advisor using it in client meetings, this guide will help you make the most of Interest Tags in Salesforce.
Place the Interest Tags component on the Profile tab of an Account record:
- Go to App Launcher > Wealth Management App > Account Tab
- From the Accounts tab, select the Rachel Adams (Sample) account.
- Click Edit Page and the page opens in Lightning App Builder.
- Click the Details tab.
- From the Components section, drag the Interest Tags component to the Details Profile tab.
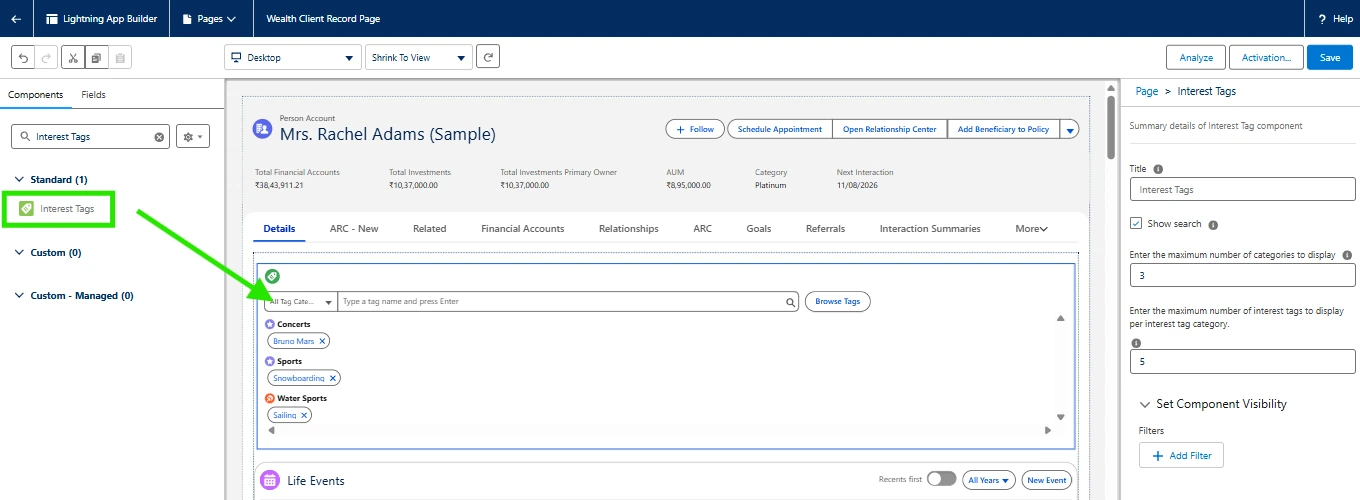
- Save your changes and the Component will appear on your page.