In this blog, you will learn how to configure and manage Interest Tags in Financial Services Cloud to make client engagement more structured, personalized, and effective. Interest Tags provide advisors with a simple yet powerful way to capture client needs, preferences, and opportunities, helping them build stronger and more meaningful relationships. By setting up curated tag categories and hierarchies, admins can create a standardized data dictionary that keeps everyone aligned while ensuring consistency across the organization.
You’ll also see how Interest Tags can be added to client profiles, connected to categories, and shared across teams to improve collaboration and data-driven conversations. Whether you’re an admin planning out the framework or an advisor using these tags during client interactions, this guide will walk you step-by-step through planning categories, creating tags, and configuring them in Salesforce.
Configure Interest Tags
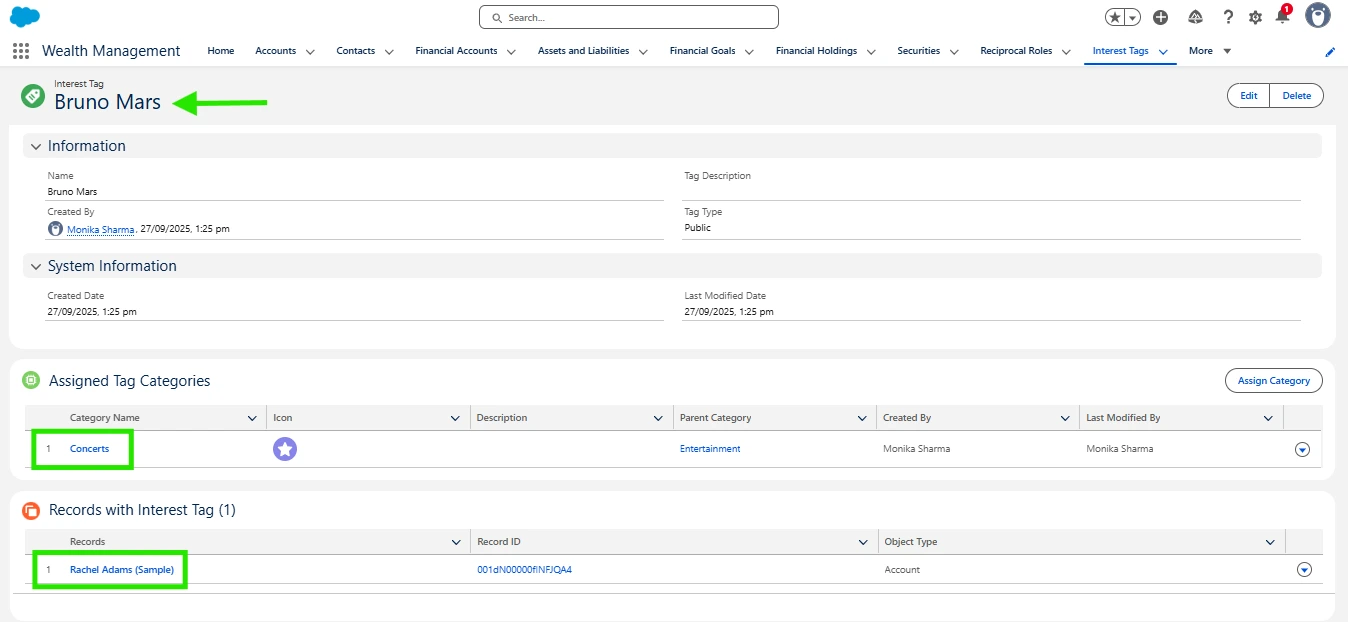
The interest tags framework will bring structure to your advisors conversations and also structure to the data in salesforce. Admin’s will create curated lists of categories and tags and allow those tags to be used on the client profiles via the Interest lightning component.
Plan Interest Tag Categories
Before you create any interest tags or tag categories, work with your team to create a shared dictionary so that everyone has a well-organized, comprehensive set of interest tags to use. Brainstorm a list of interest tags, organize them into tag categories, and then create a hierarchy of up to three levels of tag categories.
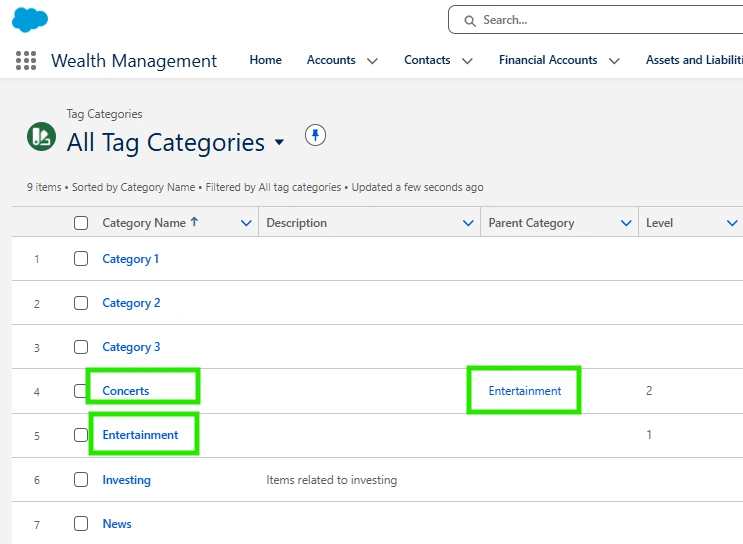
Create Tag Categories and Interest Tag
Interest Tags have a public sharing model, and the admin is the most privileged user, who can dedicate work to other privileged users to manage categories and tags as well as the data behind all this. Ultimately, this is a public data dictionary. If someone introduces new categories or new tags, they are going to be visible to the entire organization.
- Add Interest Tags and Tag Categories to the navigation bar.
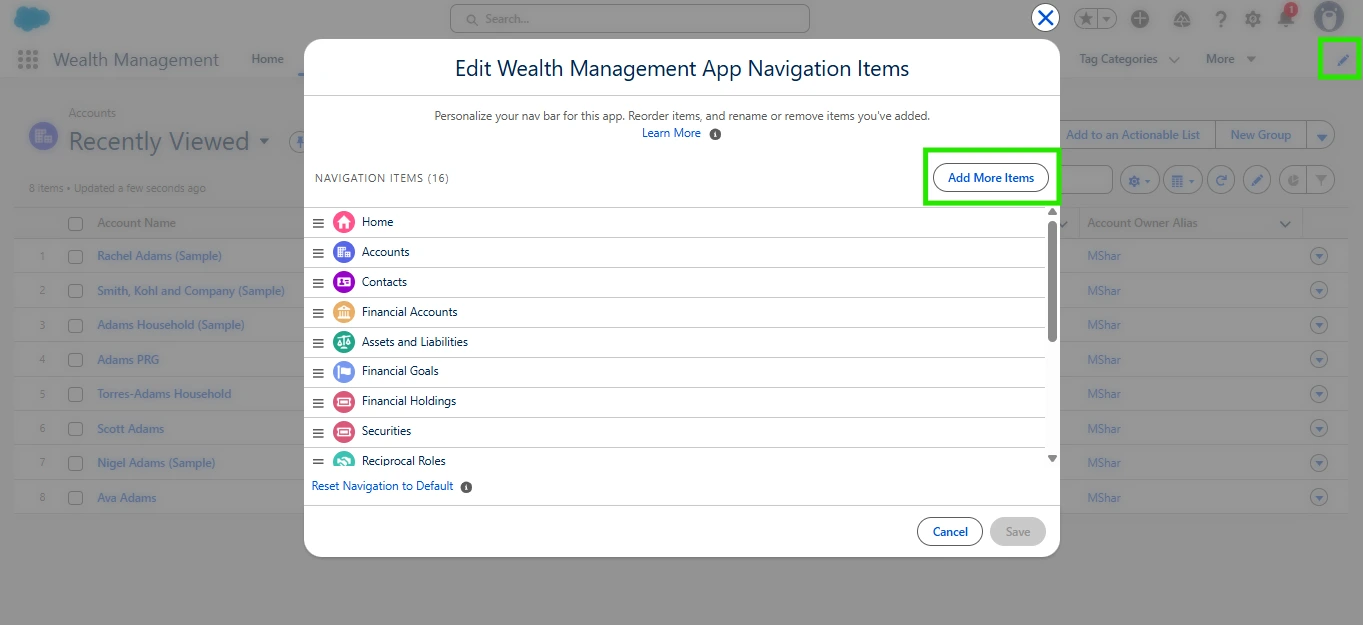
- Select Tag Categories from the navigation bar.
- In the All Tag Categories list view, click New.
- Enter a Category Name, such as Entertainment, enter a description
- For Level, enter 1, and select a fun Icon and click Save.
- To create a second-level tag category, clone the Entertainment and rename it to Concerts.
- Select Entertainment as the Parent Category.
- For Level, enter 2 and select an Icon and then click Save.